 Graphics
Reference Drawing shapes, images and styles in 2D and 3D
-
Guides
-
Background
-
Vector Graphics
-
Sprites
-
Text
-
Gizmos
-
Color Space
-
Contexts
-
Procedural Noise
-
Style
-
General
-
Constants - Shape Mode
-
Functions
-
Constants - Blend Modes
-
Constants - Blend Functions
-
Constants - Blend Factors
-
Viewport
-
Clipping
-
Stencil
-
Stencil Test
-
Stencil Operations
-
Text Style
-
Constants - Text
-
Constants - Text Styles
-
Constants - Style
-
Constants - Render Queues
-
Color Write Masks
-
Face Culling
-
Depth Comparisons
-
Color
-
Image
-
Sampler State / Mipmapping
-
Slices and Atlases
-
Fonts
Guides
Drawing in Codea top ↑
Codea can draw 2D and 3D graphics.
The draw() function is called once per frame to draw the contents of the screen.
The background(r,g,b,a) function clears the background with a given color. You typically call this once at the start of draw(). When it isn’t called, the contents of the background stay the same as the previous frame.
Draw other elements with functions such as line(), sprite() and rect().
These functions use the current drawing style, which affects things like fill color, stroke color, and stroke width.
Try it: an animated circle
This project draws a circle that moves back and forth across the screen. We use elapsed time to calculate the position of the circle.
Animated circle
Download project Open in Codea to run this example.
function setup()
end

function draw()
    background(24, 28, 38)
    style.fill(100, 220, 200).noStroke()
    local x = WIDTH * (0.5 + 0.25 * math.sin(time.elapsed))
    ellipse(x, HEIGHT / 2, 80, 80)
endStyle
Prefer simple calls such as fill(...), strokeWidth(...), and fontSize(...) to set the drawing state:
fill(255, 0, 0)
stroke(255)
strokeWidth(5)
ellipse(WIDTH/2, HEIGHT/2, 100, 100)
These functions need no style. prefix. Use the style module for additional settings, saving and restoring the drawing state, or chaining several commands together:
-- Draw a red ellipse with a 5px white stroke
style.push().fill(color.red).stroke(color.white).strokeWidth(5)
ellipse(WIDTH/2, HEIGHT/2, 100, 100)
style.pop()
See Style for the complete reference.
Anywhere a color is used as a parameter, you can use the following forms:
fill(r, g, b, a) -- separate color components in the range 0-255
fill(r, g, b) -- only red, green, blue color components with alpha assumed to be 255
fill(grey, alpha) -- only greyscale and alpha
fill(grey) -- only grayscale with alpha assumed to be 255
fill(color) -- a color object
Matrix
Use matrix to move, rotate, and scale your drawings. Its view and projection matrices control where the camera looks and how a 3D scene appears on screen. You can also use a camera to manage these settings.
Matrix commands can be chained too. Use push() to save the current matrices and pop() to restore them after drawing:
-- Translate then rotate in one expression
matrix.push().translate(100, 100).rotate(45)
rect(0, 0, 50, 50)
matrix.pop()
See Matrix for a complete reference
3D Drawing
To draw in 3D, switch from the default 2D orthographic projection to a perspective projection using matrix.perspective(). Always wrap 3D drawing in a matrix.push() / matrix.pop() pair so the 2D projection is restored afterwards.
Important
With matrix.perspective(), the camera sits at the origin and looks toward +Z. Objects must have a positive Z coordinate to be visible. Use matrix.translate() to move objects in front of the camera.
function draw()
    background(20, 20, 30)

    -- All 3D drawing goes inside a matrix.push/pop block
    matrix.push()
        matrix.perspective(60)          -- 60° field of view
        matrix.translate(0, 0, 5)       -- move object 5 units forward (+Z)
        matrix.rotate(angle, 0, 1, 0)   -- spin around Y axis
        myMesh:draw()
    matrix.pop()

    -- 2D drawing after matrix.pop() uses the default screen projection
    text("Hello", WIDTH/2, 40)
end
To position the camera elsewhere in the scene, set a custom view matrix using matrix.view() together with mat4.orbit():
matrix.push()
    matrix.perspective(60)
    -- Orbit camera: looking at origin from distance 8, tilted 20° up and 45° around Y
    matrix.view(mat4.orbit(vec3(0, 0, 0), 8, 20, 45))
    myMesh:draw()
matrix.pop()
Background
background() clears the screen each frame with a solid color (or image/shader):
background(0, 0, 0)        -- black
background(40, 40, 50)     -- dark blue-grey
background(color.white)    -- using a color object
See Drawing Commands for full documentation
Vector Drawing
Draw lines and shapes using the current Style settings:
-- Lines
style.push().stroke(255, 0, 0).strokeWidth(4)
line(100, 100, 400, 300)
style.pop()

-- Shapes
style.push().fill(0, 128, 255).stroke(255).strokeWidth(2)
rect(WIDTH/2, HEIGHT/2, 200, 100)       -- centered rectangle
ellipse(WIDTH/2, HEIGHT/2, 150, 150)    -- circle
style.pop()

-- Polygon
style.push().fill(255, 200, 0)
polygon(200,100, 300,200, 250,300, 150,300, 100,200)
style.pop()
See Drawing Commands for a complete list of vector drawing functions
Text
Draw text on the screen with text(), followed by its horizontal and vertical position. Put the call in draw() so the message appears every frame:
function draw()
    background(30)
    text("Hello, Codea!", WIDTH/2, HEIGHT/2)
end
The bottom-left corner of the screen is (0, 0). Increase x to move text to the right, or y to move it up. WIDTH/2, HEIGHT/2 is the center of the screen.
Size, color, and font
Set these before drawing your text. The following examples belong inside draw() too:
fontSize(40)
fill(255, 210, 80)
font("Arial-BoldMT")
text("You win! 🎉", WIDTH/2, HEIGHT/2)
Use fontSize to control the size in points, fill to set the color, and font to choose a font face.
Positioning and multiple lines
Use shapeMode to choose which part of a message sits at the coordinates you give to text. CORNER places the lower-left corner there, which is handy for a score near the edge of the screen:
fontSize(32)
shapeMode(CORNER)
text("Score: 120", 40, 40)
CENTER places the center of the whole message at that point:
shapeMode(CENTER)
text("Level complete!", WIDTH/2, HEIGHT/2)
Line alignment is independent of the block anchor. For a centered block with left-aligned lines:
shapeMode(CENTER)
textAlign(LEFT)
text("Level complete!\nTap to continue", WIDTH/2, HEIGHT/2)
textAlign and style.textAlign have identical behavior. Alignment and wrapping calls can be made in any order without changing the block anchor.
Use \n to start a new line. For a longer message, pass a width to text() to wrap it:
shapeMode(CORNER)
text("Explore the island and find three hidden keys before sunset.",
     40, HEIGHT/2, WIDTH - 80)
You can also supply a height to align text within a box. See textAlign() for alignment within the box, and shapeMode() for positioning the box.
Measuring text
Use textSize() when you need to leave room for a label or place another message below it. Set the font and size before measuring, just as you would before drawing:
fontSize(32)
shapeMode(CENTER)
textAlign(CENTER | MIDDLE)
local message = "Score: 120"
local width, height = textSize(message)
text(message, WIDTH/2, HEIGHT/2)
text("Best: 200", WIDTH/2, HEIGHT/2 - height - 12)
For wrapped text, pass the same width to textSize and text.
To align different fonts along the same baseline, use font.metrics(). It returns measurements such as ascent, descent, and capital-letter height for the current font and size. These describe the font rather than a particular message.
Making text stand out
A shadow helps a label remain readable over a busy background:
fontSize(40)
fill(255)
style.textShadow(color(0, 0, 0, 180), vec2(2, -2), 3)
text("Ready?", WIDTH/2, HEIGHT/2)
The color controls its tint and opacity, offset moves it relative to the text, and radius controls the blur. A radius of zero gives a sharp shadow. Use style.noTextShadow() to turn the shadow off. To change the appearance of just one label, surround its settings and drawing calls with style.push() and style.pop(). That restores the settings used by the rest of your drawing. Text settings reset each frame, so keep them inside draw().
Formatting parts of a message
Tags let you make individual words bold, italic, or a different color. You must use the atlas text renderer by calling style.textRenderer(style.atlas) before drawing tagged text:
style.push()
style.textRenderer(style.atlas)
fontSize(32)
text('Find the <b>key</b> to open the <fill color="red">red door</fill>.',
     WIDTH/2, HEIGHT/2)
style.pop()
<b>...</b> makes a span bold, <i>...</i> makes it italic, and <fill color="red">...</fill> changes its color. Close each tag after the words it should affect. Atlas text also supports decorations such as underlines:
style.push()
style.textRenderer(style.atlas)
style.textUnderline(255)
text("Next chapter", WIDTH/2, HEIGHT/2)
style.pop()
A decoration’s color enables it; set its alpha to zero to turn it off, for example style.textUnderline(255, 0).
Animating letters
When using atlas text, you can define your own tags for effects such as waving letters. Register the tag in setup(), then use it in the text you draw:
function setup()
    text.style.wave = function(tag, format)
        format.callback = function(str, index, letter)
            letter.offsetY = math.sin(time.elapsed * 5 + index) * 6
        end
    end
end

function draw()
    background(30)
    fontSize(40)
    style.textRenderer(style.atlas)
    text("<wave>Hello!</wave>", WIDTH/2, HEIGHT/2)
end
The callback adjusts each letter’s position. You can also change its color or opacity. See text.style for custom tags and glyphModifier for the per-letter controls.
Choosing native or atlas text
Most labels, scores, paragraphs, and emoji can use the default, style.native. Choose style.atlas when you want tags, underlines, or animated-letter effects. Atlas text does not support color emoji, so keep emoji labels on native rendering.
Use style.textRenderer(style.native) to switch back. You can mix both in a frame; style.push() and style.pop() are useful for keeping each label’s settings local. Remember that your style and renderer choices apply to textSize, so measure and draw with the same settings.
See Style for individual text settings and Drawing Commands for drawing, measurement, and custom effects.
Images and Sprites
Images are loaded with image.read() and drawn with sprite():
function setup()
    img = image.read(asset.builtin.Blocks.Brick)
end

function draw()
    background(0)
    sprite(img, WIDTH/2, HEIGHT/2, 200, 200)
end
Context
The context module lets you draw into an image instead of the screen, using context.push() and context.pop():
local target = image(512, 512)

context.push(target)
    background(0)
    style.push().fill(255, 0, 0)
    ellipse(256, 256, 200, 200)
    style.pop()
context.pop()

-- Now draw that image to screen
sprite(target, WIDTH/2, HEIGHT/2)
Meshes
Use a mesh to draw 3D objects or custom 2D shapes. Start with a built-in shape or define your own vertices.
Built-in mesh generators
sphereMesh   = mesh.sphere(1)          -- sphere, radius 1
boxMesh      = mesh.box(vec3(1,1,1))   -- box, 1×1×1
cylinderMesh = mesh.cylinder(0.5, 1)   -- radius 0.5, height 1
torusMesh    = mesh.torus(0.25, 1)     -- torus
Drawing a mesh in 3D
function setup()
    sphereMesh = mesh.sphere(1)
    angle = 0
end

function draw()
    background(20, 20, 30)
    angle = angle + 0.5

    matrix.push()
        matrix.perspective(60)
        matrix.translate(0, 0, 4)
        matrix.rotate(angle, 0, 1, 0)
        sphereMesh:draw()
    matrix.pop()
end
Building a mesh from vertices
Set mesh.vertices to draw a triangle for each group of three vertices. This also creates the indices that connect them. Use mesh.positions when changing an existing shape while keeping its triangle connections:
-- Each group of three vertices forms a triangle
m = mesh()
m.vertices = { vec3(0,0,0), vec3(1,0,0), vec3(0.5,1,0) }  -- one triangle
m.colors   = { color(255,0,0), color(0,255,0), color(0,0,255) }
m:draw()

-- Use positions only to deform an existing mesh (preserves its index buffer)
sph = mesh.sphere(1)
-- modify sph.positions each frame to animate without breaking sphere indices
Complete example: Rotating RGB Cube
Example
Show code (66 lines)
-- RGB Cube
-- A rotating cube with RGB vertex colors

function setup()
    viewer.mode = FULLSCREEN

    -- Build a cube mesh with 8 corners
    cubeMesh = mesh()
    local s = 0.5

    local v = {
        vec3(-s,-s,-s), vec3( s,-s,-s), vec3( s, s,-s), vec3(-s, s,-s),
        vec3(-s,-s, s), vec3( s,-s, s), vec3( s, s, s), vec3(-s, s, s),
    }

    -- Map each corner's position to an RGB color
    local function posToColor(p)
        return color(
            math.floor((p.x + s) / (2*s) * 255),
            math.floor((p.y + s) / (2*s) * 255),
            math.floor((p.z + s) / (2*s) * 255))
    end

    -- 6 faces × 2 triangles, wound for correct front-face culling
    local faces = {
        {v[5],v[6],v[7]}, {v[5],v[7],v[8]}, -- Front  (+z)
        {v[2],v[1],v[4]}, {v[2],v[4],v[3]}, -- Back   (-z)
        {v[1],v[5],v[8]}, {v[1],v[8],v[4]}, -- Left   (-x)
        {v[6],v[2],v[3]}, {v[6],v[3],v[7]}, -- Right  (+x)
        {v[8],v[7],v[3]}, {v[8],v[3],v[4]}, -- Top    (+y)
        {v[1],v[2],v[6]}, {v[1],v[6],v[5]}, -- Bottom (-y)
    }

    local verts, cols = {}, {}
    for _, tri in ipairs(faces) do
        for _, p in ipairs(tri) do
            table.insert(verts, p)
            table.insert(cols, posToColor(p))
        end
    end

    -- Use 'vertices' (not 'positions') so indices are set automatically
    cubeMesh.vertices = verts
    cubeMesh.colors   = cols

    angleX, angleY = 0, 0
end

function draw()
    background(20, 20, 30)

    angleX = angleX + 0.4
    angleY = angleY + 0.6

    -- Set up perspective projection.
    -- With matrix.perspective() the camera is at the origin looking
    -- toward +Z, so objects must have a positive Z to be visible.
    matrix.push()
        matrix.perspective(60)
        matrix.translate(0, 0, 3)      -- place cube 3 units in front
        matrix.rotate(angleX, 1, 0, 0)
        matrix.rotate(angleY, 0, 1, 0)
        cubeMesh:draw()
    matrix.pop()
end
Shaders and Materials
Both shaders and materials can be applied to a mesh to control how it is rendered. See Shaders, Materials and Shaders and Materials for details.
Lighting
Codea supports dynamic lighting via Lights. Generated meshes (mesh.sphere(), mesh.box(), etc.) use a lit material by default, so without any lights they render black. There are two ways to make them visible:
Option 1: Unlit material with a color (no light needed):
sph = mesh.sphere(1)
sph.material = material.unlit()
sph.material.color = color(100, 180, 255)
Option 2: Lit material with a directional light (produces 3D shading):
function setup()
    sph = mesh.sphere(1)
    sph.material = material.lit()
    sph.material.color = color(100, 180, 255)

    dirLight = light.directional(vec3(1, -1, 1))
    dirLight.intensity = 2
end

function draw()
    background(20, 20, 30)
    matrix.push()
        matrix.perspective(60)
        light.push(dirLight)
        matrix.translate(0, 0, 4)
        sph:draw()
        light.pop()
    matrix.pop()
end
Note
When drawing meshes directly, only light.directional() is supported. Point and spot lights are not supported for this kind of drawing.
Full sphere example
Show code (28 lines)
-- 3D Sphere with directional light

function setup()
    viewer.mode = FULLSCREEN
    sphereMesh = mesh.sphere(1)
    sphereMesh.material = material.lit()
    sphereMesh.material.color = color(100, 180, 255)

    dirLight = light.directional(vec3(1, -1, 1))
    dirLight.intensity = 2

    angle = 0
end

function draw()
    background(20, 20, 30)
    angle = angle + 0.5

    matrix.push()
        matrix.perspective(60)
        light.push(dirLight)
        matrix.translate(0, 0, 4)
        matrix.rotate(angle, 0, 1, 0)
        sphereMesh:draw()
        light.pop()
    matrix.pop()
end
Drawing shapes and changing style
Each row draws a shape with its default style, a colored fill, and a white outline. style.reset() restores the defaults. Try changing the last four rect() arguments to round each corner differently.
Drawing shapes and changing style
Download project Open in Codea to run this example.
Show code (85 lines)
-- Learn to Codea
-- Drawn in Code

function setup()
end

-- Codea calls the draw() function every frame to redraw the screen
-- This could be as much as 60 or 120 times per second, or less if
-- you demand too much from the CPU/GPU

-- Put drawing commands in here to draw the various doodads you want
function draw()

    -- Some background on the background(r,g,b,a) command
    -- This command clears the screen with the specified color. The parameters
    -- represent the amount of each primary color component to use (i.e. red, green, blue)
    -- When called all previous things drawn on the screen will be cleared with the color used
    background(25, 25, 25)

    -- 2D Vector Drawing

    -- For based 2D drawing jobs we can use the following commands:
    -- ellipse(x, y, w, h)
    -- rect(x, y, w, h)
    -- rect(x, y, w, h, radius)
    -- line(x1, y1, x2, y2)
    -- polygon(p1, p2, p3, p4...)
    -- shape(x, y, closed, func)

    -- ellipse() draws an ellipse (no kidding?) at the specified x, y location
    -- The x, y values are euclidian coordinates (i.e. horizontal and vertical) with the
    -- origin starting at 0, 0 (bottom left of the screen)
    -- Lets draw one:
    ellipse(WIDTH/2 - 120, HEIGHT/2 + 120, 100, 100)

    -- You may have noticed the all-caps constant WIDTH and HEIGHT
    -- These handily give us the current resolution of the screen in sort-of pixels
    -- (this is a retina screen thing, don't worry for now)
    -- By using WIDTH/2 and HEIGHT/2 I get the exact center of the screen regardless of how
    -- big it happens to be

    -- Style

    -- To control the things like colors and strokes for shapes we use Codea's style commands
    -- You can just do:

    fill(255, 0, 0) -- make shapes fill with red
    ellipse(WIDTH/2, HEIGHT/2 + 120, 100, 100)

    -- Make shapes have a white stroke with 5 pixel width
    -- We can also chain together multiple style commands
    style.stroke(255).strokeWidth(5)
    ellipse(WIDTH/2 + 120, HEIGHT/2 + 120, 100, 100)

    -- We can also reset the style to it's default state
    style.reset().rectMode(CENTER)

    -- We can also draw a rectangle
    -- rectMode(CENTER) makes these positions the centers of the rectangles
    rect(WIDTH/2 - 120, HEIGHT/2, 100, 100)

    fill(255, 0, 0)
    rect(WIDTH/2, HEIGHT/2, 100, 100)

    style.stroke(255).strokeWidth(5)
    rect(WIDTH/2 + 120, HEIGHT/2, 100, 100)


    style.reset().rectMode(CENTER)

    -- Rounded rectangles are possible too!
    -- Extra 1 parameter to round all corners
    rect(WIDTH/2 - 120, HEIGHT/2 - 120, 100, 100, 5)

    fill(255, 0, 0)
    rect(WIDTH/2, HEIGHT/2 - 120, 100, 100, 10)

    -- Extra 4 parameters to vary how much each corner is rounded
    style.stroke(255).strokeWidth(5)
    rect(WIDTH/2 + 120, HEIGHT/2 - 120, 100, 100, 5, 10, 5, 15)
end

function touched(touch)
end
Building an orbit with nested transforms
Satellites orbit a moving center while moons orbit each satellite. Each matrix.push() is paired with matrix.pop(), so moving one moon does not move the next satellite. Try changing the orbit radii or the number of moons.
Building an orbit with nested transforms
Download project Open in Codea to run this example.
Show code (71 lines)
-- Learn to Codea
-- The Matrix

function setup()
end

function draw()

    background(25, 25, 25)

    local r = time.elapsed * 15

    -- The matrix module gives you control over positioning of drawing commands

    -- By changing the current matrix, this changes where drawing occurs

    -- The easiest way to think of this is that the current matrix represents
    -- the origin of the screen
    -- matrix.translate(WIDTH/2, HEIGHT/2) - move drawing to the middle of the screen

    -- You can also rotate and scale drawing
    -- Transforming the matrix combines with any previous transformation
    -- i.e. matrix.translate(WIDTH/2, HEIGHT/2).translate(100, 100)
    -- Drawing will now originate 100 pixels up and to the right of the middle of the screen

    -- You can also use matrix.push()/pop() to save and load the current matrix transform
    -- similar to how style.push()/pop() is used

    -- matrix.transform2d()/transform3d() allows you to apply full transformations in one
    -- command for convenience

    -- If you need to clear all current transformations you can use matrix.reset()

    -- You can also create a mat4 (4x4 matrix) type and use this with matrix.get()/set()

    -- There are additional commands for adjusting view and projection matrices
    -- matrix.ortho() - use orthographic (2D) projection
    -- matrix.perspective() - use perspective (3D) projection
    -- matrix.projection(m) - use a custom projection matrix
    -- matrix.view(m) - use a custom view matrix

    -- Move the origin to the center of the screen and rotate over time
    matrix.transform2d(WIDTH/2, HEIGHT/2, 1, 1, r)
    ellipse(0, 0, 50)

    -- Draw 6 satellites that orbit and rotate the center
    for i = 1, 6 do
        -- Accumulate rotations
        matrix.rotate(360/6)

        -- Use additional push and transform to create a recursive hierarchy
        matrix.push().transform2d(math.min(WIDTH, HEIGHT) * 0.28, 0, 1, 1, r * 1.25)
        ellipse(0, 0, 25)

        -- Additional mini satellites that orbit the current origin
        for i = 1, 6 do
            matrix.rotate(360/6)
            matrix.push().transform2d(math.min(WIDTH, HEIGHT) * 0.075, 0)
            ellipse(0, 0, 15)
            matrix.pop()
        end

        -- Pop here is crucial to let the next satellite transform relative to its parent
        matrix.pop()
    end

end

function touched(touch)
end
Comparing blend modes
Choose a blend mode or change either color in Controls to see how overlapping colors combine. Drawing order matters: the second circle blends over the first. The images below the circles show how blending works with pictures.
Comparing blend modes
Download project Open in Codea to run this example.
Show code (46 lines)
function setup()
    parameter.color("ColorA", color(225, 138, 130))
    parameter.color("ColorB", color(169, 255, 129))

    blendModes =
    {
        "NORMAL",
        "ADDITIVE",
        "MULTIPLY",
        "SCREEN",
        "LIGHTEN",
        "LINEAR_BURN",
        "PREMULTIPLIED",
        "DISABLED"
    }

    parameter.option("Blend", blendModes)

    alpha1 = image.read(asset.Alpha1)
    alpha2 = image.read(asset.Alpha2)
end

function draw()
    background(64)

    matrix.push().translate(WIDTH/2, HEIGHT/2 + 130)

    style.reset()
    style.blend(_G[blendModes[Blend]])
    fill(ColorA)
    ellipse(-50, 0, 160)
    fill(ColorB)
    ellipse(50, 0, 160)

    matrix.translate(0, -220)

    style.reset().blendFunc(EQUATION_MAX)
    sprite(alpha1, -50, 0, 160)
    sprite(alpha2, 50, 0, 160)

    matrix.pop()
end

function touched(touch)
end
Saving and restoring styles
These swatches share three saved styles: foreground, background, and label. style.get() saves the settings and style.set() restores them. Change one saved style to update every swatch.
Saving and restoring styles
Download project Open in Codea to run this example.
Show code (54 lines)
function setup()

    -- Here are some built-in colors that come with codea!
    colors =
    {
        color.black,
        color.white,
        color.clear,
        color.cyan,
        color.gray,
        color.red,
        color.green,
        color.blue,
        color.magenta,
        color.yellow
    }

    swatchFG = style.reset().rectMode(CENTER).stroke(255).strokeWidth(3).get()
    swatchBG = style.reset().rectMode(CENTER).noStroke().fill(90).get()
    label = style.reset().fontSize(14).textAlign(CENTER).fill(200).get()

end

local colorNames = {"black", "white", "clear", "cyan", "gray", "red", "green", "blue", "magenta", "yellow"}
local SWATCH_SIZE = 100
local SWATCH_SPACING = 15

function swatch(x, y, ...)
    style.set(swatchBG)
    rect(x + 5, y - 5, SWATCH_SIZE, SWATCH_SIZE, 10)
    style.set(swatchFG).fill(...)
    rect(x, y, SWATCH_SIZE, SWATCH_SIZE, 10)
end

function draw()
    background(32)

    local columns = math.max(1, math.floor(WIDTH / (SWATCH_SIZE + SWATCH_SPACING)))
    local rows = math.ceil(#colors / columns)
    for k, v in ipairs(colors) do
        local column, row = (k - 1) % columns, math.floor((k - 1) / columns)
        matrix.push().translate((column + 0.5) * WIDTH / columns,
            HEIGHT/2 + (rows/2 - row - 0.5) * 150)
        swatch(0, 0, v)
        style.set(label)
        text(colorNames[k], 0, -SWATCH_SIZE/2 - 20)
        matrix.pop()
    end

end

function touched(touch)
end
Interpolating vertex colors
Three vertices define a triangle, with a color at each corner. Codea blends these colors across its surface. Change its size in Controls and watch it rotate.
Interpolating vertex colors
Download project Open in Codea to run this example.
Show code (59 lines)
-- Mesh Example
-- Author: John Millard


function setup()
    print("Hello Mesh!")

    -- Here we create a mesh, just a single triangle
    parameter.integer("triSize", 10, 300, 100)

    -- Create a new empty mesh
    triMesh = mesh()

    -- This is an array of colours we'll assign to the triMesh vertices
    triCol = { color(255, 0, 0, 255),
    color(255, 255, 0, 255),
    color(0, 100, 255, 255)}

    -- Assign colors to the mesh, there must be the same number of colours as vertices
    triMesh.colors = triCol
end

-- This function gets called once every frame
function draw()
    -- Dark background color
    background(20, 20, 40)

    -- Save the current transform (translation, rotation and scale)
    matrix.push()

    -- Translate coordinates to the middle of the screen
    matrix.translate(WIDTH/2, HEIGHT/2)

    -- Rotate the transform at 100 degrees per second
    matrix.rotate(time.elapsed*100)

    -- Construct equilateral triangle points, this could be any 3 points
    local top = vec2(math.cos(2*math.pi/6), math.sin(2*math.pi/6))
    top = top * triSize

    local left = vec2(math.cos(6*math.pi/6), math.sin(6*math.pi/6))
    left = left * triSize

    local right = vec2(math.cos(10*math.pi/6), math.sin(10*math.pi/6))
    right = right * triSize

    -- Set points on mesh, every 3 points constructs a new triangle
    triMesh.vertices = { top,
                         left,
                         right }

    -- Draw the mesh that we setup
    triMesh:draw()

    -- Restore the previous transform
    -- This is useful if you need to position multiple objects differently
    matrix.pop()
end
Turning a polygon into triangles
Tap around an outline without crossing its edges. mesh.triangulate() divides the polygon into triangles so it can be drawn as a filled shape.
Turning a polygon into triangles
Download project Open in Codea to run this example.
Show code (39 lines)
-- Mesh 2 - Triangulate Example
-- Author: John Millard

function setup()
    print("Hello Triangulate!")

    msh = mesh()
    points = {}
    colors = {}
end

function updateMesh()
    if #points >= 3 then
        msh.positions = points
        msh.colors = colors
        msh.indices = mesh.triangulate(points)
    end
end

-- This function gets called once every frame
function draw()
    -- Dark background color
    background(20, 20, 40)
    msh:draw()

    style.noStroke().fill(255)
    for k, v in pairs(points) do
        ellipse(v, 10)
    end
end

function touched(touch)
    if touch.state == ENDED and touch.tapCount == 1 then
        table.insert(points, touch.pos)
        table.insert(colors, color(touch.x / WIDTH * 255, touch.y / HEIGHT * 255, 128))
        updateMesh()
    end
end
Using Assets top ↑
Assets are files such as images, sounds, shaders, and 3D models. Drawing a sprite starts with choosing an image. Type sprite() and tap its highlighted parentheses to open the asset picker, then choose an image. Codea inserts an asset key, such as asset.builtin.Planet_Cute.Character_Boy.
An asset key identifies a file or folder; it is not the image data itself. Codea can check named assets and offer autocomplete while you write code. Start typing asset. to explore the available files and folders.
function draw()
    background(40)
    sprite(asset.builtin.Planet_Cute.Character_Boy, WIDTH/2, HEIGHT/2, 120)
end
Asset locations
- asset.MyImage refers to a file in your project. - asset.documents.MyImage refers to a file in Codea’s Documents folder. - asset.icloud.MyImage refers to a file in Codea’s iCloud documents. - asset.builtin.Planet_Cute.Character_Boy refers to a built-in asset pack. - asset.current refers to the project whose code is executing, including when that code belongs to a dependency. Use it for a library’s own resources. - asset.ExternalFolderName.MyImage refers to a folder reference added with the asset picker.
Loading and drawing
Pass an image asset directly to sprite(), or load it once with image.read() and keep the resulting image. The latter is useful when you also want to inspect or edit its pixels. See sound.read() and mesh.read() for other asset types.
function setup()
    character = image.read(asset.builtin.Planet_Cute.Character_Boy)
end

function draw()
    background(40)
    tint(255, 200, 200)
    sprite(character, WIDTH/2, HEIGHT/2, 120)
    style.noTint()
end
Paths and filenames
Use the concatenation operator .. to build a path dynamically or identify a file that does not exist yet. For example, save an image with image.save(asset.documents .. "Picture.png", character).
Square brackets preserve the exact filename, including spaces, punctuation, and extensions: asset.documents["My File (2).png"]. Unlike a named asset key, this lookup cannot be checked or autocompleted ahead of time.
When two files have the same name but different extensions, autocomplete uses an extension suffix to distinguish them. For example, asset.MyObject_png and asset.MyObject_obj identify MyObject.png and MyObject.obj.
Listing assets and tracking changes
Use # on an asset library to count its entries, and .all to obtain an array of asset keys. This works for the project, Documents, or a nested folder.
print("Project files:", #asset)
for i, key in ipairs(asset.all) do
    print(i, key.path)
end
Assign a function to a folder’s updated property to be notified when its contents change. This applies to folders, not individual files.
asset.updated = function(library)
    print("Project files changed:", #library)
end
See Assets and File Operations for more about storing and managing project resources.
Background
background(red, green, blue, alpha) top ↑
Syntax
background(red, green, blue, alpha)Clears the current context with solid color, can also be used to set image backgrounds when combined with context.push()
Parameters
| red | number. The red component of the color (0-255) |
| green | number. The green component of the color (0-255) |
| blue | number. The blue component of the color (0-255) |
| alpha | number. The alpha component of the color (0-255) |
background(color) top ↑
Syntax
background(color)Clears the current context with solid color, can also be used to set image backgrounds when combined with context.push()
Parameters
| color | color. The color to set the background to |
background(cubeImage, mipLevel) top ↑
Syntax
background(cubeImage, mipLevel)Clears the current background with the contents of a cube image, using the current camera settings to define eye direction
Parameters
| cubeImage | image. The image to clear the background with |
| mipLevel | number, optional, default 0. The mip level of the image to use, useful for displaying pre-blurred image mips, such as those calculated using image.generateIrradiance() |
background(shader) top ↑
Syntax
background(shader)Clears the current background using a custom shader
Parameters
| shader | shader. The shader to use when clearing the background, should be a shader that is compatible with sprite rendering (i.e. uses the same vertex attributes) |
Example
Show code (77 lines)
function setup()
    -- Create a custom background shader
    skybox = shader{
        name = "Skybox",

        properties =
        {
            {"environment", "texture"},
            {"mipLevel", "float", 0}
        },

        pass =
        {
            cullFace = "none", -- backgrounds don't need culling
            depthWrite = false, -- no need to write to depth buffer
            depthFunc = "always", -- no need for depth testing
            blendMode = "disabled", -- no need for blending
            renderQueue = "background", -- render behind everything else

            vertex =
            [[
            #version 430
            #include <codea/common.glsl>

            layout (location = POSITION) in vec3 a_position;

            layout (location = 0) out vec3 v_eyeDirection;

            void main()
            {
                // vertex layout is a quad between -1 and 1, use this to unproject and calculate eye direction from view/perspective matrix
                vec3 unprojected = (u_invProj * vec4(a_position, 1)).xyz;
                v_eyeDirection = mat3(u_invView) * unprojected;

                gl_Position = vec4(a_position.xy, 1, 1);
            }
            ]],

            fragment =
            [[
                #version 430
                #include <codea/common.glsl>

                layout (location = 0) in vec3 v_eyeDirection;
                out vec4 fragColor;

                uniform samplerCube environment;
                uniform float mipLevel;

                void main()
                {
                    vec3 rayDir = normalize(v_eyeDirection);
                    rayDir = vec3(rayDir.x, rayDir.y, rayDir.z);
                    vec3 col = texture(environment, rayDir, mipLevel).rgb;
                    fragColor = vec4(col, 1.0);
                }
            ]],
        }
    }

    local hdr = image.cube(image.read(asset.builtin.hdr.Norway_Forest))
    skybox.environment = hdr:generateIrradiance()

    -- Test mip level adjustment
    parameter.number("MipLevel", 0, 10, 0, function(mip)
        skybox.mipLevel = mip
    end)

    parameter.vec2("Rotation", vec2(0,0))
end

function draw()
    matrix.perspective()
    local v = mat4.orbit(vec3(0, 0, 0), 1, Rotation:unpack())
    matrix.view(v)
    background(skybox)
end
Vector Graphics
line(x1, y1, x2, y2) top ↑
Syntax
line(x1, y1, x2, y2)Draws 2D line from the start point (x1, y1) to the end point (x2, y2) based on the current style:
- Color with
style.stroke() - Width with
style.strokeWidth() - End Caps with
style.lineCap() SQUAREPROJECTROUND
Parameters
| x1 | number. the x coordinate of the start point |
| y1 | number. the y coordinate of the start point |
| x2 | number. the x coordinate of the end point |
| y2 | number. the y coordinate of the end point |
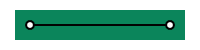
SQUARE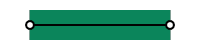
PROJECT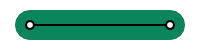
ROUNDline(x, y) top ↑
Syntax
line(x, y)Adds a straight segment from the last point to (x, y), when called inside shape()
Parameters
| x | number. x coordinate in points, transformed by the current matrix. |
| y | number. y coordinate in points, transformed by the current matrix. |
polyline(x1, y1, x2, y2, ...) top ↑
Syntax
polyline(x1, y1, x2, y2, ...)Draws a continuous 2D line with an arbitrary number of points (x1, y1, etc…) based on the current style
- Color with
style.stroke() - Width with
style.strokeWidth() - End Caps with
style.lineCap() - Line Joins with
style.lineJoin() ROUNDMITERBEVEL
Parameters
| x1 | number. X coordinate of the start point. |
| y1 | number. Y coordinate of the start point. |
| x2 | number. X coordinate of the end point. |
| y2 | number. Y coordinate of the end point. |
| ... | number. Additional x, y coordinate pairs, in drawing order. |
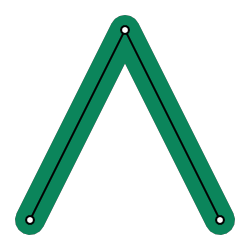
ROUND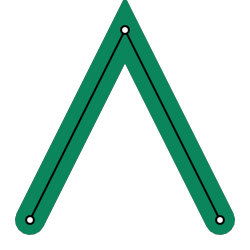
MITER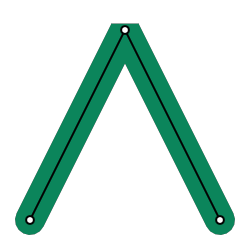
BEVELpolygon(x1, y1, x2, y2, ...) top ↑
Syntax
polygon(x1, y1, x2, y2, ...)Draws a closed 2D polygon with an arbitrary number of points based on the current style
Parameters
| x1 | number. X coordinate of the start point. |
| y1 | number. Y coordinate of the start point. |
| x2 | number. X coordinate of the end point. |
| y2 | number. Y coordinate of the end point. |
| ... | number. Additional x, y coordinate pairs, in drawing order. |
bezier(x1, y1, cx1, cy1, cx2, cy2, x2, y2) top ↑
Syntax
bezier(x1, y1, cx1, cy1, cx2, cy2, x2, y2)Draw a quadratic bezier curve using four points based on the current style
Parameters
| x1 | number. X coordinate of the start point. |
| y1 | number. Y coordinate of the start point. |
| cx1 | number. Coordinate of the corresponding Bézier control point, in points. |
| cy1 | number. Coordinate of the corresponding Bézier control point, in points. |
| cx2 | number. Coordinate of the corresponding Bézier control point, in points. |
| cy2 | number. Coordinate of the corresponding Bézier control point, in points. |
| x2 | number. X coordinate of the end point. |
| y2 | number. Y coordinate of the end point. |
bezier(cx1, cy1, cx2, cy2, x2, y2) top ↑
Syntax
bezier(cx1, cy1, cx2, cy2, x2, y2)Adds a curved segment from the last point to (x2, y2), when called inside shape()
Parameters
| cx1 | number. Coordinate of the corresponding Bézier control point, in points. |
| cy1 | number. Coordinate of the corresponding Bézier control point, in points. |
| cx2 | number. Coordinate of the corresponding Bézier control point, in points. |
| cy2 | number. Coordinate of the corresponding Bézier control point, in points. |
| x2 | number. X coordinate of the end point. |
| y2 | number. Y coordinate of the end point. |
shape(x, y, closed, func) top ↑
Syntax
shape(x, y, closed, func)Draws a shape from a path that starts at (x, y) and is built by the drawing commands called inside func. The shape is filled and outlined using the current style
Inside func, use line(x, y) and bezier(cx1, cy1, cx2, cy2, x2, y2) to add segments from the last point. Commands such as rect() and ellipse() add separate outlines to the shape. An outline inside another one cuts a hole in it
Parameters
| x | number. the x coordinate of the first point |
| y | number. the y coordinate of the first point |
| closed | boolean, optional, default true. whether to join the last point back to the first and fill the shape. An open shape is only outlined |
| func | function. a function that builds the shape |
A speech bubble with a hole
function draw()
    background(40, 40, 50)
    style.fill(255, 200, 50).stroke(220, 120, 30).strokeWidth(4)

    shape(200, 300, function()
        -- The tail
        line(250, 300)
        line(220, 230)
        line(300, 300)

        line(500, 300)
        bezier(560, 300, 560, 450, 500, 450)
        line(200, 450)
        bezier(140, 450, 140, 300, 200, 300)

        -- This outline cuts a hole in the bubble
        ellipse(350, 375, 60, 60)
    end)
end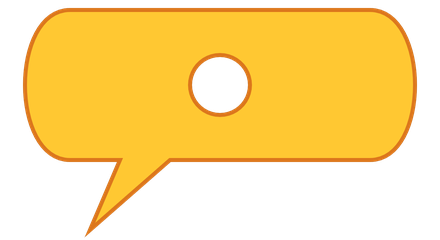
arc(x, y, radius, startAngle, endAngle, dir) top ↑
Syntax
arc(x, y, radius, startAngle, endAngle, dir)Draws a 2D arc with a given origin, radius and start, end angles + direction
Parameters
| x | number. x coordinate of the arc origin |
| y | number. y coordinate of the arc origin |
| radius | number. the radius arc |
| startAngle | number. the start angle of the arc (in degrees) |
| endAngle | number. the end angle of the arc (in degrees) |
| dir | integer. the direction of the arc, 1 or clockwise, -1 for anti-clockwise |
ellipse(x, y, w, h) top ↑
Syntax
ellipse(x, y, w, h)Draw an ellipse with a given origin point and width / height (or radius)
Parameters
| x | number. x coordinate in points, transformed by the current matrix. |
| y | number. y coordinate in points, transformed by the current matrix. |
| w | number. Width or height in points; interpreted using the current shape mode. |
| h | number. Width or height in points; interpreted using the current shape mode. |
rect(x, y, w, h, radius) top ↑
Syntax
rect(x, y, w, h, radius)Draws a rectangle with a given origin point and width / height, origin and sizing behaviour depends on style.shapeMode()
Optional parameter radius specified the corner radius
Parameters
| x | number. the x coordinate of the rectangle |
| y | number. the y coordinate of the rectangle |
| w | number. the width of the rectangle |
| h | number. the height of the rectangle |
| radius | number, optional, default 0. the radius of the rounded corners |
rect(x, y, w, h, r1, r2, r3, r4) top ↑
Syntax
rect(x, y, w, h, r1, r2, r3, r4)Draws a rectangle with a given origin point and width / height, origin and sizing behaviour depends on style.shapeMode()
The corner radius of each corner can be set independently using the additional parameters r1, r2, r3 and r4
Parameters
| x | number. the x coordinate of the rectangle |
| y | number. the y coordinate of the rectangle |
| w | number. the width of the rectangle |
| h | number. the height of the rectangle |
| r1 | number. the radius of the top-left corner |
| r2 | number. the radius of the top-right corner |
| r3 | number. the radius of the bottom-right corner |
| r4 | number. the radius of the bottom-left corner |
Sprites
sprite(image, x, y, w, h) top ↑
Syntax
sprite(image, x, y, w, h)Draws an image, an image asset, or a slice from a sprite atlas. Pass an asset key such as asset.builtin.Planet_Cute.Character_Boy to load an image, or pass an image you have already created or loaded with image.read(). An image.slice draws a selected region of an image.
By default, x and y locate the center of the sprite. Change the origin with style.spriteMode(). Without a size, the sprite uses its natural dimensions. Supply only w to preserve its aspect ratio, or both w and h to stretch it to a particular size. Coordinates and sizes are in points, transformed by the current matrix.
Use tint(...) to multiply the sprite’s colors and alpha, and style.noTint() to restore its original colors. Call sprite() in draw() to display the image each frame.
Parameters
| image | image or asset.key or image.slice. Image, asset key identifying an image, or image slice to draw. |
| x | number. Horizontal position, interpreted using the current sprite mode. |
| y | number. Vertical position, interpreted using the current sprite mode. |
| w | number, optional. Optional width in points; defaults to the image’s natural width. |
| h | number, optional. Optional height in points; when omitted, preserves the aspect ratio. |
function draw()
    background(40)
    style.spriteMode(CENTER).noTint()
    sprite(asset.builtin.Planet_Cute.Character_Boy, WIDTH/2, HEIGHT/2, 120)
end
sprite(shader, x, y, w, h) top ↑
Syntax
sprite(shader, x, y, w, h)Draws a rectangle with a custom shader or material. Supply both dimensions: there is no source image from which to infer its size. The shader must support sprite vertex attributes. Positioning follows style.spriteMode() and the current matrix, just as it does for an image sprite.
Parameters
| shader | shader or material. Shader or material used to render the rectangle. |
| x | number. Horizontal position in points. |
| y | number. Vertical position in points. |
| w | number. Width of the rectangle in points. |
| h | number. Height of the rectangle in points. |
Text
text(str, x, y, w, h) top ↑
Syntax
text(str, x, y, w, h)Draws text at x, y. Call it inside draw() to show the text every frame. Set fontSize(), font(), and fill() before drawing to choose its size, font, and color. Emoji work by default.
Use \n for a new line, or supply w to wrap a longer message. Add h to align the text within a box using textAlign(). Position the whole block with shapeMode(): CENTER centers it at x, y and CORNER places its lower-left corner there. CORNERS interprets the last pair as the opposite corner; RADIUS interprets it as half-dimensions. Without explicit bounds, the block uses its measured size. The box controls layout; it does not clip text that extends beyond it. Numbers and other values are converted to strings.
See Drawing for positioning, wrapping, shadows, and tagged-text examples. For advanced per-letter effects, see text.style.
Parameters
| str | string. The text to draw. |
| x | number. The x coordinate of the text. |
| y | number. The y coordinate of the text. |
| w | number, optional. Optional width in points, half-width in RADIUS mode, or opposite x coordinate in CORNERS mode. When omitted, uses the measured width and textWrapWidth. |
| h | number, optional. Optional height in points, half-height in RADIUS mode, or opposite y coordinate in CORNERS mode. When omitted, uses the measured height. |
fontSize(32)
fill(255)
text("Score: 120", WIDTH/2, HEIGHT/2)
textSize(str, width) top ↑
Syntax
textSize(str, width)Measures text in points so you can reserve space for it or position nearby content. Set the same font, size, and other text settings that you will use when drawing. Supply width when measuring wrapped text.
The returned size is always full width and height in points, independent of shapeMode and paragraph alignment. If you use textWrapWidth, that width applies when no explicit width is supplied.
Parameters
| str | string. the text to query |
| width | number, optional. the width of the textbox |
Returns
number |
The width and height of the text |
number |
textRenderer(renderer) top ↑
Syntax
textRenderer(renderer)Alias of style.textRenderer(). Use style.native for everyday text and emoji, or style.atlas for tags, decorations, and animated letters. Set this before drawing and measuring text.
Parameters
| renderer | enum. style.native or style.atlas. |
Returns
style |
The style table, for chaining. |
textRenderer() top ↑
Syntax
textRenderer()Alias of style.textRenderer(). Gets the current text renderer.
Returns
enum |
style.native or style.atlas. |
textLineHeight() top ↑
Syntax
textLineHeight()Gets the atlas font line height. This currently uses atlas metrics even when style.native is selected. For native measurements, use textSize().
Returns
number |
The line height, or zero if the atlas font cannot be loaded. |
textBounds(str, x, y) top ↑
Syntax
textBounds(str, x, y)Reserved API. Currently returns four zeros; bounds calculation is not implemented. Use textSize() for working width and height measurements.
Parameters
| str | string. The text to query. |
| x | number. The draw x coordinate. |
| y | number. The draw y coordinate. |
Returns
number |
Four zeros (not implemented). |
number |
|
number |
|
number |
glyphBounds(str, x, y, index) top ↑
Syntax
glyphBounds(str, x, y, index)Reserved API. Currently returns four zeros; glyph bounds calculation is not implemented.
Parameters
| str | string. The text to query. |
| x | number. The draw x coordinate. |
| y | number. The draw y coordinate. |
| index | integer. The one-based glyph index. |
Returns
number |
Four zeros (not implemented). |
number |
|
number |
|
number |
text.style top ↑
Syntax
text.styleDefines reusable formatting and animation effects for tagged text. Register your tags in setup(). For example, give warning messages a consistent color:
Then use the tag when drawing:
Each handler receives tag, format, and an optional index argument. Read custom tag attributes through textTag, and change the span’s appearance through textFormatting. index is the zero-based text index. Handlers are registered by assignment; the table does not return previously registered handlers.
To animate individual letters, assign a function to format.callback. It receives the text, a one-based glyph index, and a glyphModifier. Adjust the modifier’s position, color, or opacity to make letters wave, shake, or appear gradually. See Drawing for a short wave example, or explore the combined effects below.
text.style.warning = function(tag, format)
    format.fillColor = color(255, 180, 40)
    format.fontName = "Helvetica-Bold"
endstyle.textRenderer(style.atlas)
text("<warning>Low fuel!</warning>", WIDTH/2, HEIGHT/2)Example: waving, shaking, and revealing text
Show code (99 lines)
function setup()
    text.style.wave = function(tag, format)
        local height = tag:number("height", 2)
        format.fillColor = color.red
        format.fontName = "Helvetica-BoldOblique"
        format.callback = function(str, i, mod)
            mod.offsetY = mod.offsetY + math.sin(time.elapsed*5 + i) * height
        end
    end

    text.style.shake = function(tag, format)
        local intensity = tag:number("intensity", 2)

        format.callback = function(str, i, mod)
            local r1 = (math.random() * 0.5 - 0.5) * intensity
            local r2 = (math.random() * 0.5 - 0.5) * intensity

            mod.offsetX = mod.offsetX + r1
            mod.offsetY = mod.offsetY + r2
        end
    end

    text.style.appear = function(tag, format)
        local t = timer * tag:number("speed", 5)

        format.callback = function(str, i, mod)
            local a = math.min(math.max(t - i, 0.0), 1.0)
            local len = str:len()
            mod.offsetY = 5 * math.cos(a * math.pi/2)
            mod.alpha = a * 255
        end
    end

    parameter.text("str", "<appear speed='15'><b>This</b> line will appear and <shake intensity = '2'>shake</shake> and <wave height='5'>wave</wave> and might wrap at some point...</appear>")
    --parameter.text("str", "Here is a line of text that might wrap at some point...")
    parameter.integer("fontSize", 5, 100, 24)
    parameter.number("WaveHeight", 0, 10, 5)
    parameter.option("TextAlignH", {"LEFT", "CENTER", "RIGHT"}, 2)
    parameter.option("TextAlignV", {"BOTTOM", "MIDDLE", "TOP"}, 2)

    parameter.action("Reset", function() timer = 0 end)

    alignH = {LEFT, CENTER, RIGHT}
    alignV = {BOTTOM, MIDDLE, TOP}
    timer = 0

    --[[
    scn = scene.default3d()
    local rig = scn.camera:add(camera.rigs.orbit)
    rig.distance = 50
    rig.angles.y = -45
    rig.angles.y = -75
    scene.main = scn--]]


end

function draw()

    local boxWidth = 400
    local boxHeight = 200

    background(128)

    --matrix.ortho()

    -- Setup the text drawing style
    font("Arial")
    style.fill(color.cyan).fontSize(fontSize)

    matrix.transform3d(WIDTH/2 - 50, HEIGHT/2 - boxHeight/2, 0, 2, 2, 2, 0, 0, 0)
    --matrix.transform3d(0, 0, 0, 0.1, 0.1, 0.1, 0, 0, 0)

    fill(255)
    style.stroke(0).strokeWidth(5).textRenderer(style.atlas)
    --noStroke()
    shapeMode(CORNER)
    textAlign(alignH[TextAlignH] | alignV[TextAlignV])

    local so = (CurrentTouch.pos - vec2(WIDTH/2, HEIGHT/2)) * 0.1

    style.textShadow(color(0, 0, 0, 128), so, 10)

    -- Cache some locals for performance
    local len = str:len()
    local cps = 10
    local t = timer * 5
    local r1, r2 = string.find(str, "text")

    text(str, 0, 0, boxWidth, boxHeight)

    timer = timer + time.delta

    -- Draw the text's bounding box and origin
    style.noFill().stroke(color.yellow).strokeWidth(2)
    rect(0, 0, boxWidth, boxHeight)
    ellipse(0, 0, 10)
end
textTag top ↑
Syntax
textTagA tag supplied to a rich-text callback. Created by the renderer; no constructor.
textTag:number(name, default)
Syntax
textTag:number(name, default)Reads a numeric XML attribute, returning the default if it is missing or invalid.
Parameters
| name | string. The attribute name. |
| default | number. The fallback value. |
Returns
number |
The attribute value or fallback. |
textFormatting top ↑
Syntax
textFormattingMutable formatting supplied to a rich-text tag callback. Created by the renderer; no constructor. Color values use color objects.
textFormatting.textAlign
Syntax
textFormatting.textAlignText alignment flags.
textFormatting.fontSize
Syntax
textFormatting.fontSizeFont size in points.
textFormatting.fontName
Syntax
textFormatting.fontNameFont name.
textFormatting.fillColor
Syntax
textFormatting.fillColorText fill color.
textFormatting.strokeColor
Syntax
textFormatting.strokeColorText outline color.
textFormatting.strokeWidth
Syntax
textFormatting.strokeWidthText outline width.
textFormatting.textOverline
Syntax
textFormatting.textOverlineOverline color.
A nonzero alpha enables this decoration; zero disables it. The default is transparent.
textFormatting.textUnderline
Syntax
textFormatting.textUnderlineUnderline color.
A nonzero alpha enables this decoration; zero disables it. The default is transparent.
textFormatting.textStrikeThrough
Syntax
textFormatting.textStrikeThroughStrikethrough color.
A nonzero alpha enables this decoration; zero disables it. The default is transparent.
textFormatting.textBackground
Syntax
textFormatting.textBackgroundBackground color.
A nonzero alpha enables this decoration; zero disables it. The default is transparent.
textFormatting:textShadow(color, offset, radius)
Syntax
textFormatting:textShadow(color, offset, radius)Adds a shadow to this tagged span.
Set the color, offset, and radius together. A transparent color disables the shadow. The default is no shadow. Shadows do not change text measurements.
Parameters
| color | color. The shadow color, including opacity. |
| offset | vec2. The shadow displacement in points. Positive x moves right; positive y moves up. |
| radius | number. The blur radius in points. Zero gives a sharp shadow; must be non-negative. |
Returns
textFormatting |
The formatting object, for chaining. |
format:textShadow(color(0, 0, 0, 160), vec2(2, -2), 4)textFormatting:textShadow()
Syntax
textFormatting:textShadow()Gets the shadow color, offset, and radius. A disabled shadow returns a transparent color while retaining its offset and radius.
Returns
color |
The color, offset, and radius. |
vec2 |
|
number |
textFormatting:noTextShadow()
Syntax
textFormatting:noTextShadow()Disables the shadow by setting its opacity to zero.
Returns
textFormatting |
The formatting object, for chaining. |
textFormatting.callback
Syntax
textFormatting.callbackGlyph callback: function(str, index, mod). The index is one-based and mod is a glyphModifier. Used only by atlas rich text.
glyphModifier top ↑
Syntax
glyphModifierMutable glyph data supplied to a formatting callback. Created by the renderer; no constructor. Changes affect the current glyph in atlas rich text.
glyphModifier.offsetX
Syntax
glyphModifier.offsetXHorizontal glyph offset in pixels.
glyphModifier.offsetY
Syntax
glyphModifier.offsetYVertical glyph offset in pixels.
glyphModifier.alpha
Syntax
glyphModifier.alphaSets glyph opacity from 0 to 255. The getter currently returns 255, not the edited opacity.
glyphModifier.color
Syntax
glyphModifier.colorSets glyph color. The getter currently returns a default color, not the edited glyph color.
Gizmos
gizmos.line(x1, y1, z1, x2, y2, z2)
Syntax
gizmos.line(x1, y1, z1, x2, y2, z2)Draws a 3D antialiased line for debugging scene geometry or building editing tools.
Parameters
| x1 | number. X coordinate of the start point. |
| y1 | number. Y coordinate of the start point. |
| z1 | number. Z coordinate of the start point. |
| x2 | number. X coordinate of the end point. |
| y2 | number. Y coordinate of the end point. |
| z2 | number. Z coordinate of the end point. |
Color Space
colorspace(type) top ↑
Syntax
colorspace(type)Changes the color space used for drawing images and sprites
Parameters
| type | integer. Either GAMMA or LINEAR |
Contexts
context.push(image, layer, mip) top ↑
Syntax
context.push(image, layer, mip)Pushes an image to the context, causing subsequent drawing operations to be applied to said image until context.pop() is called
Parameters
| image | image. The image to push |
| layer | integer, optional, default 0. The layer of image to draw to |
| mip | integer, optional, default 0. The mip of the image to draw to |
context.pop() top ↑
Syntax
context.pop()Pops the current image from the context if one exists, subsequent drawing operations are again applied to the main context (i.e. the display)
Procedural Noise
noise(x, y, z) top ↑
Syntax
noise(x, y, z)Samples smooth Perlin noise. Nearby coordinates produce nearby values, useful for terrain, organic motion, and textures. Omitted coordinates are zero. Scale the input to control how quickly values vary; use math.random when independent random samples are wanted instead.
Parameters
| x | number. First noise coordinate. |
| y | number, optional. Optional second coordinate, default zero. |
| z | number, optional. Optional third coordinate, default zero. |
Returns
number |
Noise value at the supplied coordinates. |
function draw()
    background(30)
    local height = noise(time.elapsed * 0.25) * 80
    fill(255)
    ellipse(WIDTH / 2, HEIGHT / 2 + height, 50)
end
Style
Setting Drawing Styles top ↑
Use the simple functions below to set colors, outlines, and text styles for drawing. These are first-class Codea APIs and need no style. prefix. Use the style module when chaining commands or working with additional drawing settings.
fill(color) top ↑
Syntax
fill(color)Sets the color used to fill shapes and draw text. Call with no arguments to get the current red, green, blue, and alpha components.
Parameters
| color | color or number. A color object or grayscale value. Also accepts fill(r, g, b[, a]) and fill(gray, alpha). Components range from 0 to 255; omitted alpha is 255. |
noFill() top ↑
Syntax
noFill()Disables shape filling, leaving only the outline. Call fill(...) to enable filling again.
stroke(color) top ↑
Syntax
stroke(color)Sets the outline color for shapes and text. Call with no arguments to get the current red, green, blue, and alpha components. Use strokeWidth(...) to set the outline thickness.
Parameters
| color | color or number. A color object or grayscale value. Also accepts stroke(r, g, b[, a]) and stroke(gray, alpha). Components range from 0 to 255; omitted alpha is 255. |
noStroke() top ↑
Syntax
noStroke()Sets the stroke width to zero, disabling outlines. Call strokeWidth(...) with a positive width to enable them again.
tint(color) top ↑
Syntax
tint(color)Multiplies sprite colors and alpha by this color. Use tint(255) to restore the original colors. Call with no arguments to get the current red, green, blue, and alpha components.
Parameters
| color | color or number. A color object or grayscale value. Also accepts tint(r, g, b[, a]) and tint(gray, alpha). Components range from 0 to 255; omitted alpha is 255. |
strokeWidth(width) top ↑
Syntax
strokeWidth(width)Sets the outline thickness in drawing units. Zero disables outlines. Call with no arguments to get the current width.
Parameters
| width | number. Outline thickness; zero disables strokes. |
lineCap(mode) top ↑
Syntax
lineCap(mode)Sets the end caps used by lines, polylines, and shapes. Call with no arguments to get the current mode.
Parameters
| mode | integer. ROUND, SQUARE, or PROJECT. |
lineJoin(mode) top ↑
Syntax
lineJoin(mode)Sets how connected line segments join in polylines, polygons, and shapes. Call with no arguments to get the current mode.
Parameters
| mode | integer. ROUND, MITER, or BEVEL. |
shapeMode(mode) top ↑
Syntax
shapeMode(mode)Sets the drawing mode for rectangles, ellipses, sprites, and text blocks. Text lines are aligned inside the block using textAlign; alignment never moves the block. Text defaults to CENTER. Calling this setter updates all four drawing modes together. With no arguments, it returns the rectangle mode.
For text with explicit bounds, CORNER uses a lower-left corner and dimensions, CENTER uses a center and dimensions, CORNERS uses opposite corners, and RADIUS uses a center and half-dimensions. Without explicit bounds, text uses its measured size: CORNER and CORNERS anchor at the lower-left; CENTER and RADIUS anchor at the center. textWrapWidth limits wrapping without changing the anchor. textSize always returns full dimensions.
Parameters
| mode | integer. CENTER uses a center and width/height; CORNER uses a lower-left corner and width/height; CORNERS uses opposite corners; RADIUS uses a center and radii. |
font(name) top ↑
Syntax
font(name)Chooses a system font for text. Select a font face such as Arial-BoldMT for bold text. Call with no arguments to get the current name. The same font table also provides font.metrics().
Parameters
| name | string. System font name, such as Helvetica or Arial-BoldMT. |
fontSize(size) top ↑
Syntax
fontSize(size)Sets the text size in points. The default is 17. Call with no arguments to get the current size.
Parameters
| size | number. Font size in points. |
textAlign(align) top ↑
Syntax
textAlign(align)Aligns lines within the text block, identically to style.textAlign. Use shapeMode() to position the whole block. Combine LEFT, CENTER, or RIGHT with TOP, MIDDLE, or BOTTOM using bitwise OR to align text inside an explicit box. Horizontal-only alignment starts at the top of the box. Without explicit bounds, the block uses its measured size. Call with no arguments to get the current flags. Alignment does not change block positioning or wrapping.
Parameters
| align | integer. LEFT, CENTER, or RIGHT for horizontal alignment. In an explicit text box, combine with TOP, MIDDLE, or BOTTOM using bitwise OR. |
textWrapWidth(width) top ↑
Syntax
textWrapWidth(width)Sets the wrapping width used by text and textSize unless an explicit width is supplied. Call with no arguments to get the current width.
Parameters
| width | number. Wrapping width in points. Zero disables wrapping; negative values are clamped to zero. |
Text Style top ↑
Set the font, size, and alignment before calling text(). Use style.fill() for text color. For a step-by-step introduction, see the text examples in Drawing.
Color Write Masks top ↑
Used by shaders to control which color components are written to color buffers (i.e. images and the main context)
Face Culling top ↑
Used by shaders / meshes to control which triangles are culled (based on winding order)
Depth Comparisons top ↑
Used by shaders to control depth rejection for opaque and translucent fragments
General
style.push() top ↑
Syntax
style.push()Push the current style onto the stack
Returns
style |
The style table, for chaining. |
style.push(style) top ↑
Syntax
style.push(style)Push a specific style onto the stack
Parameters
| style | table. Style snapshot returned by style.get(). |
Returns
style |
The style table, for chaining. |
style.pop() top ↑
Syntax
style.pop()Pop the current style from the stack, restoring the previous style
Returns
style |
The style table, for chaining. |
style.reset() top ↑
Syntax
style.reset()Reset the current style to defaults. Use this to restore the default style
Returns
style |
The style table, for chaining. |
style.get() top ↑
Syntax
style.get()Capture separate styles for the foreground, shadow, and label, then restore each before drawing. Changing a saved style updates every swatch that uses it.
Gets the current style as a graphicsStyle object, allowing styles to be saved and restored arbitrarily
Reusable swatch styles
Download project Open in Codea to run this example.
Show code (54 lines)
function setup()

    -- Here are some built-in colors that come with codea!
    colors =
    {
        color.black,
        color.white,
        color.clear,
        color.cyan,
        color.gray,
        color.red,
        color.green,
        color.blue,
        color.magenta,
        color.yellow
    }

    swatchFG = style.reset().rectMode(CENTER).stroke(255).strokeWidth(3).get()
    swatchBG = style.reset().rectMode(CENTER).noStroke().fill(90).get()
    label = style.reset().fontSize(14).textAlign(CENTER).fill(200).get()

end

local colorNames = {"black", "white", "clear", "cyan", "gray", "red", "green", "blue", "magenta", "yellow"}
local SWATCH_SIZE = 100
local SWATCH_SPACING = 15

function swatch(x, y, ...)
    style.set(swatchBG)
    rect(x + 5, y - 5, SWATCH_SIZE, SWATCH_SIZE, 10)
    style.set(swatchFG).fill(...)
    rect(x, y, SWATCH_SIZE, SWATCH_SIZE, 10)
end

function draw()
    background(32)

    local columns = math.max(1, math.floor(WIDTH / (SWATCH_SIZE + SWATCH_SPACING)))
    local rows = math.ceil(#colors / columns)
    for k, v in ipairs(colors) do
        local column, row = (k - 1) % columns, math.floor((k - 1) / columns)
        matrix.push().translate((column + 0.5) * WIDTH / columns,
            HEIGHT/2 + (rows/2 - row - 0.5) * 150)
        swatch(0, 0, v)
        style.set(label)
        text(colorNames[k], 0, -SWATCH_SIZE/2 - 20)
        matrix.pop()
    end

end

function touched(touch)
end
style.set(style) top ↑
Syntax
style.set(style)Sets the current style from a graphicsStyle object
Parameters
| style | table. Style snapshot returned by style.get(). |
Returns
style |
The style table, for chaining. |
style.fill(color) top ↑
Syntax
style.fill(color)Sets the fill color for use in vector drawing operations
Parameters
| color | color or number. Color object or grayscale value from 0 to 255. RGB and RGBA numeric forms are also accepted. |
Returns
style |
The style table, for chaining. |
style.fill() top ↑
Syntax
style.fill()Gets the current fill color for use in vector drawing operations
style.noFill() top ↑
Syntax
style.noFill()Disables fill
Returns
style |
The style table, for chaining. |
style.stroke(color) top ↑
Syntax
style.stroke(color)Sets the stroke color to the specified color, or a grayscale value
Parameters
| color | color or number. The color to set the stroke to, or a grayscale value |
Returns
style |
The style table, for chaining. |
style.stroke(gray, alpha) top ↑
Syntax
style.stroke(gray, alpha)Sets the stroke color to the specified grayscale value and alpha
Parameters
| gray | number. The grayscale value to set the stroke to |
| alpha | number. The alpha value to set the stroke to |
Returns
style |
The style table, for chaining. |
style.stroke(red, green, blue) top ↑
Syntax
style.stroke(red, green, blue)Sets the stroke color to the specified red, green, and blue values
Parameters
| red | number. The red value to set the stroke to |
| green | number. The green value to set the stroke to |
| blue | number. The blue value to set the stroke to |
Returns
style |
The style table, for chaining. |
style.stroke(red, green, blue, alpha) top ↑
Syntax
style.stroke(red, green, blue, alpha)Sets the stroke color to the specified red, green, blue, and alpha values
Parameters
| red | number. The red value to set the stroke to |
| green | number. The green value to set the stroke to |
| blue | number. The blue value to set the stroke to |
| alpha | number. The alpha value to set the stroke to |
Returns
style |
The style table, for chaining. |
style.stroke() top ↑
Syntax
style.stroke()Gets the current stroke color for use in vector drawing operations
style.noStroke() top ↑
Syntax
style.noStroke()Disables stroke
Returns
style |
The style table, for chaining. |
style.tint(color) top ↑
Syntax
style.tint(color)Sets the tint color for use with sprite() and mesh.draw()
Parameters
| color | color or number. Color object or grayscale value from 0 to 255. RGB and RGBA numeric forms are also accepted. |
Returns
style |
The style table, for chaining. |
style.tint() top ↑
Syntax
style.tint()Gets the current tint color
style.pixelScaling(scale) top ↑
Syntax
style.pixelScaling(scale)Sets/gets the scale of a sprite when rendering
Parameters
| scale | number. the scaling factor of the sprite image |
Returns
style |
The style table, for chaining. |
style.strokeWidth(width) top ↑
Syntax
style.strokeWidth(width)Sets the stroke width for use in vector drawing operations
Parameters
| width | number. Stroke width in points. |
Returns
style |
The style table, for chaining. |
style.strokeWidth() top ↑
Syntax
style.strokeWidth()Gets the current stroke width
style.lineCap(mode) top ↑
Syntax
style.lineCap(mode)Sets the current line cap mode, used by line, polyline and shape
ROUNDSQUAREPROJECT
Parameters
| mode | enum. ROUND, SQUARE, or PROJECT. |
Returns
style |
The style table, for chaining. |
style.lineCap() top ↑
Syntax
style.lineCap()Gets the current line cap mode
style.lineJoin(mode) top ↑
Syntax
style.lineJoin(mode)Sets the current line join mode, used by polyline, polygon and shape when joining multiple line segments
ROUNDMITERBEVEL
Parameters
| mode | enum. ROUND, MITER, or BEVEL. |
Returns
style |
The style table, for chaining. |
style.lineJoin() top ↑
Syntax
style.lineJoin()Gets the current line join mode
style.shapeMode(mode) top ↑
Syntax
style.shapeMode(mode)Sets the current shape mode, used by rect, ellipse, sprite, and text(). This also sets the text block anchor. Use textAlign() to align lines within that block.
For text with explicit bounds, CORNER uses a lower-left corner and dimensions, CENTER uses a center and dimensions, CORNERS uses opposite corners, and RADIUS uses a center and half-dimensions. Without explicit bounds, text uses its measured size: CORNER and CORNERS anchor at the lower-left; CENTER and RADIUS anchor at the center. textWrapWidth limits wrapping without changing the anchor. textSize always returns full dimensions.
CENTER- Draw shapes from the center and size using width/heightCORNERS- Draw shapes by specifying the two opposite cornersCORNER- Draw shapes by specifying the bottom left corner and then width/heightRADIUS- Draw shapes by specifying center and radius
Parameters
| mode | enum. CENTER, CORNERS, CORNER, or RADIUS. |
Returns
style |
The style table, for chaining. |
style.shapeMode() top ↑
Syntax
style.shapeMode()Gets the current shape mode
Constants - Shape Mode
style.sortOrder(order) top ↑
Syntax
style.sortOrder(order)Parameters
| order | integer. Draw sorting order; used when depth-based sorting is enabled. |
Returns
style |
The style table, for chaining. |
style.depth(enabled) top ↑
Syntax
style.depth(enabled)Sets whether immediate drawing uses depth testing. Defaults to false.
Inside an entity’s draw() callback, enable this to let sprites and text (both native and atlas renderers) be hidden by scene geometry. They test the scene’s depth buffer without writing to it, so transparent parts of a sprite or glyph do not hide later drawing. With depth disabled, these calls draw over scene geometry. Sprite components retain their built-in depth testing; mesh materials control their own depth behavior.
Outside scenes, enabled shapes, sprites, text and meshes using the default 2D shader both test and write depth. A drawing target with a depth buffer is required. Depth testing is disabled with drawOrder.ordered, including the default 2D scene configuration; use drawOrder.distance for scene depth testing.
Sprite and text calls retain their drawing order after scene geometry. This does not sort intersecting translucent objects. Each entity draw callback inherits the current style and restores it on return, so enabling depth in one callback does not enable it for other entities.
Parameters
| enabled | boolean. whether 2D drawing uses depth testing |
Returns
style |
The style table, for chaining. |
style.depth() top ↑
Syntax
style.depth()Gets whether 2D drawing uses depth testing
Functions
style.blend(mode) top ↑
Syntax
style.blend(mode)Sets the current blend mode to one of the available presets. Blending composites pixels onto the current drawing context based on source and destination color and alpha values
The default mode is NORMAL which applies standard alpha blended transparency with the following equation:
DISABLED can be used to disable alpha blending entirely
Parameters
| mode | integer. Blend preset, such as NORMAL, ADDITIVE, or DISABLED. |
Returns
style |
The style table, for chaining. |
style.blend(src, dst) top ↑
Syntax
style.blend(src, dst)Sets a custom blend mode for both rgb and alpha components using src (source) and dst destination blending factors
Parameters
| src | integer. Blend factor constant for the corresponding source or destination channel, such as SRC_ALPHA or ONE_MINUS_SRC_ALPHA. |
| dst | integer. Blend factor constant for the corresponding source or destination channel, such as SRC_ALPHA or ONE_MINUS_SRC_ALPHA. |
Returns
style |
The style table, for chaining. |
style.blend(src, dst, srcAlpha, dstAlpha) top ↑
Syntax
style.blend(src, dst, srcAlpha, dstAlpha)Sets a custom blend mode with separate blending factors for both rgb and alpha components
Parameters
| src | integer. Blend factor constant for the corresponding source or destination channel, such as SRC_ALPHA or ONE_MINUS_SRC_ALPHA. |
| dst | integer. Blend factor constant for the corresponding source or destination channel, such as SRC_ALPHA or ONE_MINUS_SRC_ALPHA. |
| srcAlpha | integer. Blend factor constant for the corresponding source or destination channel, such as SRC_ALPHA or ONE_MINUS_SRC_ALPHA. |
| dstAlpha | integer. Blend factor constant for the corresponding source or destination channel, such as SRC_ALPHA or ONE_MINUS_SRC_ALPHA. |
Returns
style |
The style table, for chaining. |
style.blend() top ↑
Syntax
style.blend()Returns the current blend factors for both rgb and alpha components (regardless of how the blend modes were set)
style.blendFunc(func) top ↑
Syntax
style.blendFunc(func)Sets the same blend function for both rgb and alpha components (the default is EQUATION_ADD) which determines how source and destination parts of the blending equation are combined
EQUATION_ADD- Add (default)- R = R_sk_s+R_dk_d
EQUATION_SUB- Subtract- R = R_sk_s-R_dk_d
EQUATION_REVSUB- Reverse subtract- R = R_dk_d-R_sk_s
EQUATION_MIN- Minimum (blend factors are ignored)- R = min(R_s, R_d)
EQUATION_MAX- Maximum (blend factors are ignored)- R = max(R_s, R_d)
Parameters
| func | integer. Blend equation constant, such as EQUATION_ADD. |
Returns
style |
The style table, for chaining. |
style.blendFunc(func, alphaFunc) top ↑
Syntax
style.blendFunc(func, alphaFunc)Sets separate blend functions for rgb and alpha components
Parameters
| func | integer. Blend equation constant, such as EQUATION_ADD. |
| alphaFunc | integer. Blend equation constant, such as EQUATION_ADD. |
Returns
style |
The style table, for chaining. |
style.blendFunc() top ↑
Syntax
style.blendFunc()Returns the current blend function for both rgb and alpha components (regardless of how the functions were set)
Constants - Blend Modes
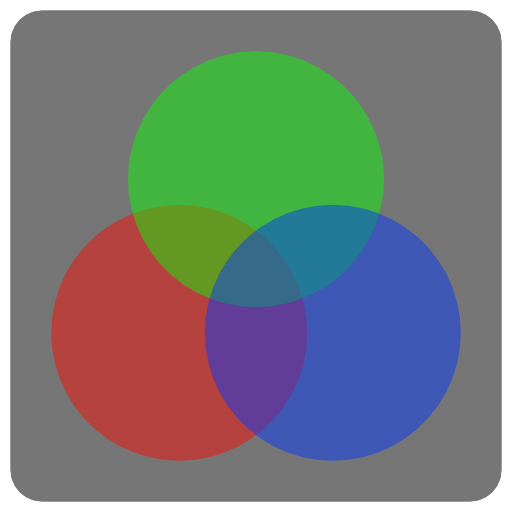
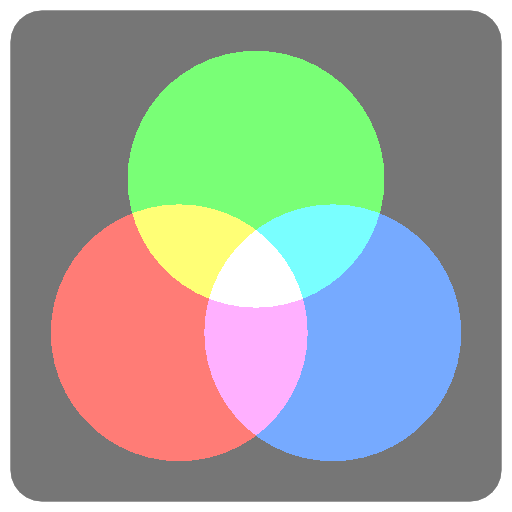
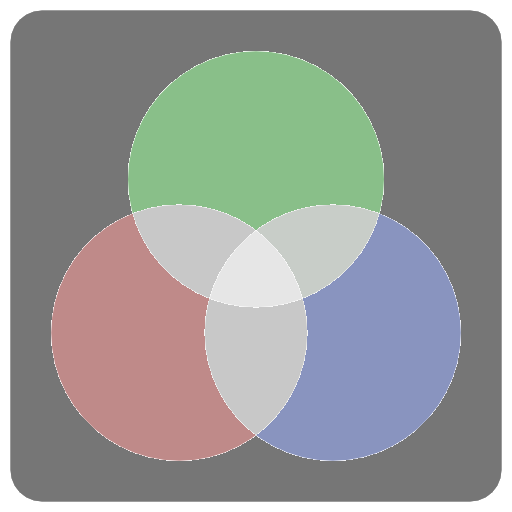
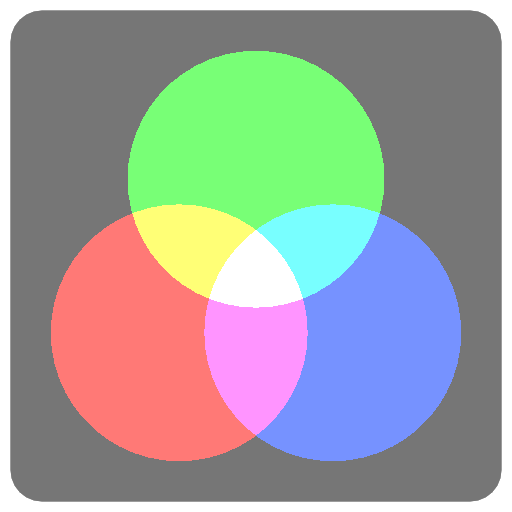
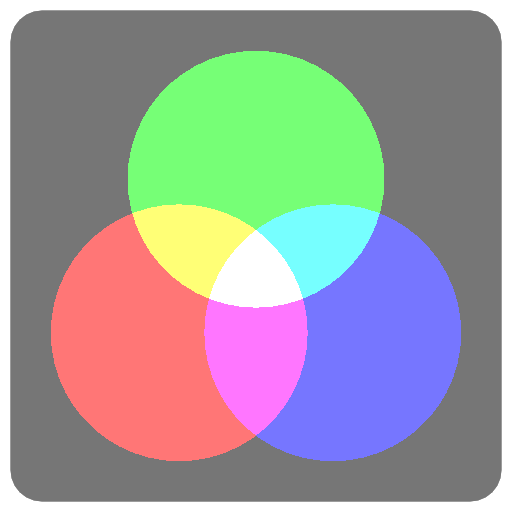
LINEAR_BURN top ↑
Syntax
LINEAR_BURNLinear burn blend mode
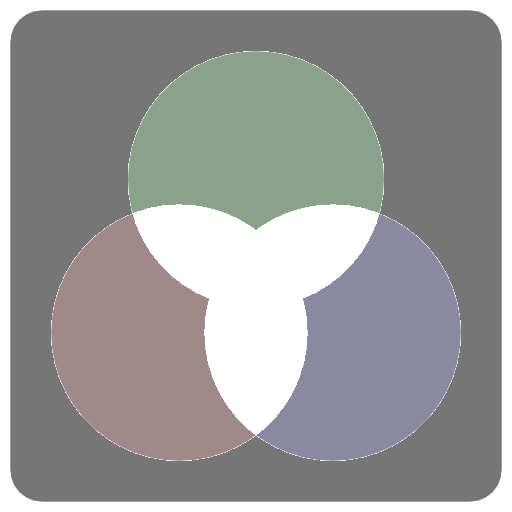
PREMULTIPLIED top ↑
Syntax
PREMULTIPLIEDPremultiplied blend mode
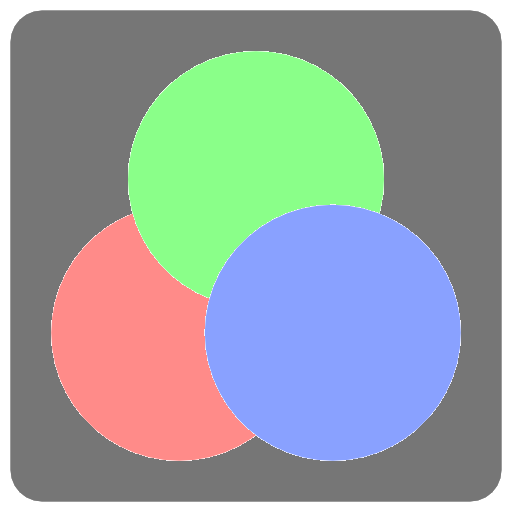
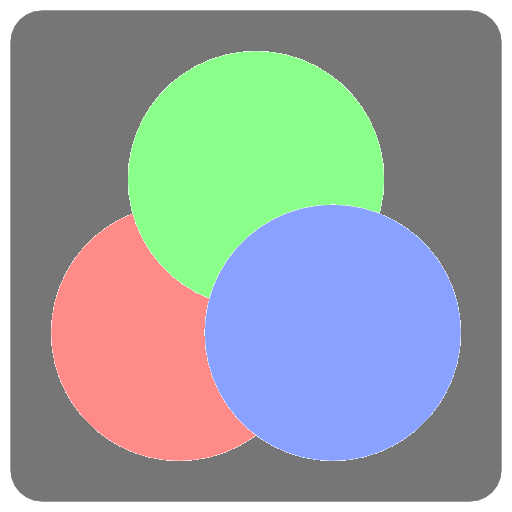
Constants - Blend Functions
EQUATION_ADD top ↑
Syntax
EQUATION_ADDCombines source and destination pixels using addition
EQUATION_SUB top ↑
Syntax
EQUATION_SUBCombines source and destination pixels using subtraction
EQUATION_REVSUB top ↑
Syntax
EQUATION_REVSUBCombines source and destination pixels using subtraction in reverse order
EQUATION_MIN top ↑
Syntax
EQUATION_MINCombines source and destination pixels by taking the minimum of each component (ignores blend factors)
EQUATION_MAX top ↑
Syntax
EQUATION_MAXCombines source and destination pixels by taking the maximum of each component (ignores blend factors)
Constants - Blend Factors
ONE_MINUS_SRC_COLOR top ↑
Syntax
ONE_MINUS_SRC_COLORBlend factor of (1-R_s, 1-G_s, 1-B_s, 1-A_s)
ONE_MINUS_SRC_ALPHA top ↑
Syntax
ONE_MINUS_SRC_ALPHABlend factor of (1-A_s, 1-A_s, 1-A_s, 1-A_s)
ONE_MINUS_DST_ALPHA top ↑
Syntax
ONE_MINUS_DST_ALPHABlend factor of (1-A_d, 1-A_d, 1-A_d, 1-A_d)
SRC_ALPHA_SATURATE top ↑
Syntax
SRC_ALPHA_SATURATEBlend factor of (f, f, f, 1) where f = min(A_s, 1 - A_d)
Viewport
style.viewRect(x, y, w, h) top ↑
Syntax
style.viewRect(x, y, w, h)Sets the viewport of the renderer
Parameters
| x | number. The x position of the viewport |
| y | number. The y position of the viewport |
| w | number. The width of the viewport |
| h | number. The height of the viewport |
Returns
style |
The style table, for chaining. |
Clipping
style.clip(x, y, w, h) top ↑
Syntax
style.clip(x, y, w, h)Settings the clipping rectangle, limiting drawing to within the clipping region
Note: the clipping rectangle is effected by the current matrix transform
Parameters
| x | number. Clipping rectangle origin coordinate, in points. |
| y | number. Clipping rectangle origin coordinate, in points. |
| w | number. Clipping rectangle width or height, in points. |
| h | number. Clipping rectangle width or height, in points. |
Returns
style |
The style table, for chaining. |
style.noClip() top ↑
Syntax
style.noClip()Disables clipping
Returns
style |
The style table, for chaining. |
Stencil
style.stencil(state) top ↑
Syntax
style.stencil(state)Sets the current stencil state for both front and back faces
Parameters
| state | table. Stencil settings table with reference, condition, readMask, pass, fail, and zfail fields. |
Returns
style |
The style table, for chaining. |
style.stencil() top ↑
Syntax
style.stencil()Gets the current stencil state for both front and back faces
style.stencil(front, back) top ↑
Syntax
style.stencil(front, back)Sets the current stencil state for front and back faces separately
Parameters
| front | table. Stencil settings table with reference, condition, readMask, pass, fail, and zfail fields. |
| back | table. Stencil settings table with reference, condition, readMask, pass, fail, and zfail fields. |
Returns
style |
The style table, for chaining. |
Using Stencils top ↑
A stencil state is configured using a table with the following properties:
referenceconditionreadMaskpassfailzfail
A simple mask effect using stencils
Show code (27 lines)
function draw()
   background(40, 40, 50)

   -- When a pixel is drawn write 1 to the stencil buffer
   style.stencil
   {
      reference = 1,
      pass = STENCIL_OP_REPLACE
   }

   -- Use opacity clip to only draw pixels when alpha is greater than .99
   style.opacityClip(0.99)
   style.blend(DISABLED) -- no blending needed
   matrix.push().transform2d(CurrentTouch.x, CurrentTouch.y, 1, 1, time.elapsed * 50)
   sprite(asset.builtin.Cargo_Bot.Codea_Icon, 0, 0, 400)
   matrix.pop()

   style.blend(NORMAL)
   style.noOpacityClip()
   -- Only draw if stencil is equal to one using the equal test condition
   style.stencil
   {
      reference = 1,
      condition = STENCIL_TEST_EQUAL
   }
   sprite(asset.builtin.SpaceCute.Beetle_Ship, WIDTH/2, HEIGHT/2, 400)
end
Stencil Test
STENCIL_TEST_LESS top ↑
Syntax
STENCIL_TEST_LESSSTENCIL_TEST_LEQUAL top ↑
Syntax
STENCIL_TEST_LEQUALSTENCIL_TEST_EQUAL top ↑
Syntax
STENCIL_TEST_EQUALSTENCIL_TEST_GEQUAL top ↑
Syntax
STENCIL_TEST_GEQUALSTENCIL_TEST_GREATER top ↑
Syntax
STENCIL_TEST_GREATERSTENCIL_TEST_NOTEQUAL top ↑
Syntax
STENCIL_TEST_NOTEQUALSTENCIL_TEST_NEVER top ↑
Syntax
STENCIL_TEST_NEVERSTENCIL_TEST_ALWAYS top ↑
Syntax
STENCIL_TEST_ALWAYSStencil Operations
STENCIL_OP_ZERO top ↑
Syntax
STENCIL_OP_ZEROSTENCIL_OP_KEEP top ↑
Syntax
STENCIL_OP_KEEPSTENCIL_OP_REPLACE top ↑
Syntax
STENCIL_OP_REPLACESTENCIL_OP_INCREMENT_WRAP top ↑
Syntax
STENCIL_OP_INCREMENT_WRAPSTENCIL_OP_INCREMENT top ↑
Syntax
STENCIL_OP_INCREMENTSTENCIL_OP_DECREMENT_WRAP top ↑
Syntax
STENCIL_OP_DECREMENT_WRAPSTENCIL_OP_DECREMENT top ↑
Syntax
STENCIL_OP_DECREMENTSTENCIL_OP_INVERT top ↑
Syntax
STENCIL_OP_INVERTText Style
style.font(name) top ↑
Syntax
style.font(name)Sets the font by its system font name. For bold or italic text, choose the corresponding font face, such as Arial-BoldMT.
Parameters
| name | string. A system font name. |
Returns
style |
The style table, for chaining. |
style.font() top ↑
Syntax
style.font()Gets the current font name.
Returns
string |
The current value. |
style.fontSize(size) top ↑
Syntax
style.fontSize(size)Sets the font size in points. The default is 17.
Parameters
| size | number. The font size in points. |
Returns
style |
The style table, for chaining. |
style.fontSize() top ↑
Syntax
style.fontSize()Gets the current font size.
Returns
number |
The current value. |
style.textAlign(align) top ↑
Syntax
style.textAlign(align)Aligns lines within the text block, identically to textAlign. Use shapeMode() to position the whole block. Combine LEFT, CENTER, or RIGHT with TOP, MIDDLE, or BOTTOM using bitwise OR to align text inside an explicit box. Horizontal-only alignment starts at the top of the box. Without explicit bounds, the block uses its measured size. Call with no arguments to get the current flags. Alignment does not change block positioning or wrapping.
Parameters
| align | integer. The alignment flags. |
Returns
style |
The style table, for chaining. |
style.textAlign() top ↑
Syntax
style.textAlign()Gets the current text alignment flags.
Returns
integer |
The current value. |
style.textWrapWidth(width) top ↑
Syntax
style.textWrapWidth(width)Sets the maximum text width before words wrap onto another line. The width is in points and applies to both text() and textSize() when no explicit width is supplied. Use zero for no wrapping limit. Negative values are treated as zero.
Parameters
| width | number. The wrapping width, or zero. |
Returns
number |
The resulting wrapping width. |
style.textWrapWidth() top ↑
Syntax
style.textWrapWidth()Gets the maximum text width before wrapping, or zero if there is no limit.
Returns
number |
The current value. |
style.textOverline(color) top ↑
Syntax
style.textOverline(color)Sets the overline color for atlas text. A nonzero alpha enables the decoration; alpha zero disables it. The default is transparent.
Parameters
| color | color or number. A color or grayscale value from 0 to 255. |
Returns
style |
The style table, for chaining. |
style.textOverline() top ↑
Syntax
style.textOverline()Gets the overline color components.
Returns
number |
Red, green, blue, and alpha components (0–255). |
number |
|
number |
|
number |
style.textUnderline(color) top ↑
Syntax
style.textUnderline(color)Sets the underline color for atlas text. A nonzero alpha enables the decoration; alpha zero disables it. The default is transparent.
Parameters
| color | color or number. A color or grayscale value from 0 to 255. |
Returns
style |
The style table, for chaining. |
style.textUnderline() top ↑
Syntax
style.textUnderline()Gets the underline color components.
Returns
number |
Red, green, blue, and alpha components (0–255). |
number |
|
number |
|
number |
style.textStrikeThrough(color) top ↑
Syntax
style.textStrikeThrough(color)Sets the strikethrough color for atlas text. A nonzero alpha enables the decoration; alpha zero disables it. The default is transparent.
Parameters
| color | color or number. A color or grayscale value from 0 to 255. |
Returns
style |
The style table, for chaining. |
style.textStrikeThrough() top ↑
Syntax
style.textStrikeThrough()Gets the strikethrough color components.
Returns
number |
Red, green, blue, and alpha components (0–255). |
number |
|
number |
|
number |
style.textBackground(color) top ↑
Syntax
style.textBackground(color)Sets the background color for atlas text. A nonzero alpha enables the decoration; alpha zero disables it. The default is transparent.
Parameters
| color | color or number. A color or grayscale value from 0 to 255. |
Returns
style |
The style table, for chaining. |
style.textBackground() top ↑
Syntax
style.textBackground()Gets the text background color components.
Returns
number |
Red, green, blue, and alpha components (0–255). |
number |
|
number |
|
number |
style.textShadow(color, offset, radius) top ↑
Syntax
style.textShadow(color, offset, radius)Adds a shadow behind text to help it stand out from the background.
Set the color, offset, and radius together. A transparent color disables the shadow. The default is no shadow. Shadows do not change text measurements.
Parameters
| color | color. The shadow color, including opacity. |
| offset | vec2. The shadow displacement in points. Positive x moves right; positive y moves up. |
| radius | number. The blur radius in points. Zero gives a sharp shadow; must be non-negative. |
Returns
style |
The style table, for chaining. |
style.textShadow(color(0, 0, 0, 160), vec2(2, -2), 4)style.textShadow() top ↑
Syntax
style.textShadow()Gets the shadow color, offset, and radius. A disabled shadow returns a transparent color while retaining its offset and radius.
Returns
color |
The color, offset, and radius. |
vec2 |
|
number |
style.noTextShadow() top ↑
Syntax
style.noTextShadow()Disables the shadow by setting its opacity to zero.
Returns
style |
The style table, for chaining. |
style.textRenderer(renderer) top ↑
Syntax
style.textRenderer(renderer)Chooses the text features you want to use. Leave the default, style.native, for everyday text and emoji. Choose style.atlas for formatting tags, decorations, or animated letters. Atlas text does not support color emoji.
Set this before drawing and measuring text. Settings reset each frame, so select atlas inside draw() when using it every frame. style.push() and style.pop() save and restore the selection. Also available as textRenderer.
Parameters
| renderer | enum. style.native or style.atlas. |
Returns
style |
The style table, for chaining. |
style.textRenderer() top ↑
Syntax
style.textRenderer()Gets the renderer shared by text drawing and measurement. Also available as the global textRenderer() function.
Returns
enum |
style.native or style.atlas. |
style.native top ↑
Syntax
style.nativeThe default choice for labels, paragraphs, and color emoji. Use style.textRenderer(style.native) to return to it after drawing tagged text. Tags such as <b> appear as ordinary text with this choice.
style.atlas top ↑
Syntax
style.atlasChoose this for formatting tags, decorations, and animated-letter effects: style.textRenderer(style.atlas). Tags are interpreted automatically. Color emoji are not supported.
Constants - Text
Constants - Text Styles
Constants - Style
Constants - Render Queues
BACKGROUND top ↑
Syntax
BACKGROUNDTRANSPARENT top ↑
Syntax
TRANSPARENTColor Write Masks
COLOR_MASK_NONE top ↑
Syntax
COLOR_MASK_NONECOLOR_MASK_RED top ↑
Syntax
COLOR_MASK_REDCOLOR_MASK_GREEN top ↑
Syntax
COLOR_MASK_GREENCOLOR_MASK_BLUE top ↑
Syntax
COLOR_MASK_BLUECOLOR_MASK_ALPHA top ↑
Syntax
COLOR_MASK_ALPHACOLOR_MASK_RGB top ↑
Syntax
COLOR_MASK_RGBCOLOR_MASK_RGBA top ↑
Syntax
COLOR_MASK_RGBAFace Culling
CULL_FACE_NONE top ↑
Syntax
CULL_FACE_NONECULL_FACE_FRONT top ↑
Syntax
CULL_FACE_FRONTCULL_FACE_BACK top ↑
Syntax
CULL_FACE_BACKDepth Comparisons
DEPTH_WRITE_ENABLED top ↑
Syntax
DEPTH_WRITE_ENABLEDDEPTH_WRITE_DISABLED top ↑
Syntax
DEPTH_WRITE_DISABLEDDEPTH_FUNC_NEVER top ↑
Syntax
DEPTH_FUNC_NEVERDEPTH_FUNC_LESS top ↑
Syntax
DEPTH_FUNC_LESSDEPTH_FUNC_EQUAL top ↑
Syntax
DEPTH_FUNC_EQUALDEPTH_FUNC_LESS_EQUAL top ↑
Syntax
DEPTH_FUNC_LESS_EQUALDEPTH_FUNC_GREATER top ↑
Syntax
DEPTH_FUNC_GREATERDEPTH_FUNC_NOT_EQUAL top ↑
Syntax
DEPTH_FUNC_NOT_EQUALDEPTH_FUNC_GREATER_EQUAL top ↑
Syntax
DEPTH_FUNC_GREATER_EQUALColor
color()
Syntax
color()Creates transparent black, with all four components set to 0.
Returns
color |
color(gray, alpha)
Syntax
color(gray, alpha)Creates a grayscale color. Components use the range 0 to 255.
Parameters
| gray | number. Value shared by the red, green, and blue channels. |
| alpha | number, optional, default 255. Opacity, from 0 (transparent) to 255 (opaque). |
Returns
color |
color(red, green, blue, alpha)
Syntax
color(red, green, blue, alpha)Creates a color from red, green, and blue components in the range 0 to 255.
Parameters
| red | number. Red component. |
| green | number. Green component. |
| blue | number. Blue component. |
| alpha | number, optional, default 255. Opacity, from 0 (transparent) to 255 (opaque). |
Returns
color |
color.fromHSV(h, s, v)
Syntax
color.fromHSV(h, s, v)Creates a new color object from HSV values
Parameters
| h | number. Hue in degrees, from 0 to 360. |
| s | number. Saturation or value, from 0 to 1. |
| v | number. Saturation or value, from 0 to 1. |
color.fromHSV(hsv)
Syntax
color.fromHSV(hsv)Creates a color from a vector containing hue in degrees, saturation from 0 to 1, and value from 0 to 1.
Parameters
| hsv | vec3. Hue, saturation, and value in x, y, and z respectively. |
color.r
Syntax
color.rThe red component of the color
color.g
Syntax
color.gThe green component of the color
color.b
Syntax
color.bThe blue component of the color
color.a
Syntax
color.aThe alpha component of the color
color.linear
Syntax
color.linearThis color converted to linear space
color.gamma
Syntax
color.gammaThis color converted to gamma space
color:grayscale()
Syntax
color:grayscale()Returns the color converted to grayscale
color:hsv()
Syntax
color:hsv()Returns the color converted to HSV values
color:unpack()
Syntax
color:unpack()Returns the color as a tuple of 4 numbers
color.mix(a, b, t)
Syntax
color.mix(a, b, t)Linearly interpolates between two colors, performing a (1-t) + b t
Parameters
| a | color. First or second color to interpolate between. |
| b | color. First or second color to interpolate between. |
| t | number. Interpolation amount: 0 selects a, 1 selects b. |
color.black
Syntax
color.blackcolor.white
Syntax
color.whitecolor.clear
Syntax
color.clearcolor.cyan
Syntax
color.cyancolor.gray
Syntax
color.graycolor.grey
Syntax
color.greycolor.red
Syntax
color.redcolor.green
Syntax
color.greencolor.blue
Syntax
color.bluecolor.magenta
Syntax
color.magentacolor.yellow
Syntax
color.yellowImage
Using Images top ↑
Load images once in setup() and draw them with sprite() each frame. The same image can texture a mesh or serve as an offscreen drawing target. Use image.read(assetKey) for an existing asset and image(width, height) for an empty target. Pair context.push(image) with context.pop() when drawing into an image, then draw that image on screen.
Choose the image format and mipmap settings when creating a target. Mipmaps help when a texture is viewed at smaller sizes; floating-point formats preserve values outside the usual color range for lighting and effects. The format and sampler sections below explain those choices.
Loading and drawing an image
function setup()
   -- load an image from a builtin image asset
   img = image.read(asset.builtin.Cargo_Bot.Codea_Icon)
end

function draw()
   background(64)
   sprite(img, WIDTH/2, HEIGHT/2)
endimage(width, height, hasMips, numLayers, format, depthFormat)
Syntax
image(width, height, hasMips, numLayers, format, depthFormat)Create a blank 2D image in logical points (default format is rgba8). The backing texture is allocated at the display scale. Use image.pixel() when dimensions must match physical texels, such as a compute simulation grid.
The size is in points, like WIDTH and HEIGHT, so the image has as many pixels per point as the screen: image(100, 100) is 300 by 300 pixels on a 3x display, and draws sharply at 100 by 100. Use image.pixel() for an image with an exact number of pixels.
Parameters
| width | integer. The width of the image in points |
| height | integer. The height of the image in points |
| hasMips | boolean, optional, default false. Enables mipmapping for this image |
| numLayers | integer, optional, default 1. The number of layers for this image |
| format | image format, optional, default image.rgba8. The image format |
| depthFormat | depth format, optional, default none. The image depth format |
Returns
image |
image.pixel(width, height, hasMips, numLayers, format, depthFormat)
Syntax
image.pixel(width, height, hasMips, numLayers, format, depthFormat)Create a blank 2D image of exactly width by height pixels, whatever the display scale. Takes the same parameters as image(). Use it for pixel art, emulator screens and other images where each pixel matters.
For compute data, use a floating-point format when needed and dispatch using the image dimensions and shader workgroup size.
Parameters
| width | integer. The width of the image in pixels |
| height | integer. The height of the image in pixels |
| hasMips | boolean, optional, default false. Enables mipmapping for this image |
| numLayers | integer, optional, default 1. The number of layers for this image |
| format | image format, optional, default image.rgba8. The image format |
| depthFormat | depth format, optional, default none. The image depth format |
Returns
image |
A pixel-exact screen
function setup()
    -- 160 by 144 pixels on every device
    screen = image.pixel(160, 144)
    screen.filter = image.filter.point
end

function draw()
    background(0)
    sprite(screen, WIDTH/2, HEIGHT/2, 160 * 2, 144 * 2)
end
state = image.pixel(256, 192, false, 1, image.rgba32f)
simulation:setImage("imageOut", state)
local wx, wy = simulation:workgroupSize()
simulation:dispatch(math.ceil(state.width / wx), math.ceil(state.height / wy), 1)image.cube(size)
Syntax
image.cube(size)Create a blank cube image (6 faces with equal sized dimensions)
Parameters
| size | integer. The size of the image cube |
image.cube(equirect)
Syntax
image.cube(equirect)Creates a cube image from a single equirect image (i.e. hdr)
Parameters
| equirect | image. The source equirect image |
image.cube(imageNX, imagePX, imageNY, imagePY, imageNZ, imagePZ)
Syntax
image.cube(imageNX, imagePX, imageNY, imagePY, imageNZ, imagePZ)Creates a cube image from six source images, one for each cube face
Parameters
| imageNX | image. Image for the N X cube face. |
| imagePX | image. Image for the P X cube face. |
| imageNY | image. Image for the N Y cube face. |
| imagePY | image. Image for the P Y cube face. |
| imageNZ | image. Image for the N Z cube face. |
| imagePZ | image. Image for the P Z cube face. |
image.volume(width, height, depth, format)
Syntax
image.volume(width, height, depth, format)Creates a blank volume image with the given dimensions
Parameters
| width | integer. The width of the volume image |
| height | integer. The height of the volume image |
| depth | integer. The depth of the volume image |
| format | image format. The format of the volume image |
image.read(key)
Syntax
image.read(key)Read an image asset from the filesystem
Parameters
| key | asset.key. The asset key to load |
Returns
image |
image.save(key, image)
Syntax
image.save(key, image)Save an image asset to the filesystem
Parameters
| key | assetKey. The asset key to save the image to |
| image | image. The image to save |
image.dfg()
Syntax
image.dfg()Creates a copy of the 64 by 64 lookup image (rgba16f) that Codea’s physically based lighting uses for image based lighting, for use in your own shaders
Returns
image |
image.symbol(name, ...)
Syntax
image.symbol(name, ...)Create an image from an SF Symbol. Returns nil if no symbol of that name exists.
A monochrome symbol is rendered white, so it can be recoloured at draw time with tint(). Pass a colour to bake one in instead. Symbols drawn with image.symbol.multicolor, image.symbol.hierarchical or image.symbol.palette carry their own colours — draw those with tint(255), since tint multiplies.
Options may be given in any order after the name. A flag is passed as-is (image.symbol.multicolor, image.symbol.weight.bold); an option that carries values is called with them (image.symbol.variable(0.5)). A bare number is the point size, and a colour tints a monochrome symbol.
Parameters
| name | string. The SF Symbol name, e.g. "globe" or "cloud.sun.fill" |
| ... | number or color or userdata. Point size, tint color, and image.symbol option values; see the supported options below. |
Returns
image or nil |
Using SF Symbols
Show code (26 lines)
function setup()
    -- white by default, so tint() works
    globe = image.symbol("globe")

    -- or bake a colour in
    warning = image.symbol("exclamationmark.triangle.fill", color(255, 200, 0))

    -- the symbol's own colours
    weather = image.symbol("cloud.sun.fill", image.symbol.multicolor)

    -- a fill level from 0 to 1
    signal = image.symbol("wifi", image.symbol.variable(0.66))

    -- larger and heavier
    gauge = image.symbol("gauge", image.symbol.weight.bold, 64)
end

function draw()
    background(40)

    tint(255, 0, 0)
    sprite(globe, WIDTH/2, HEIGHT/2)

    tint(255)               -- do not tint a multicolour symbol
    sprite(weather, WIDTH/2, HEIGHT/2 - 100)
end
image.symbol
Syntax
image.symbolA table containing the rendering modes for image.symbol(), and the weight and scale sub-tables below. Options may be passed in any order after the symbol name.
Flags, passed as-is:
monochrome- A single colour (the default), rendered white so it can be recoloured withtint()multicolor- The symbol’s own intrinsic colours
Options that carry values, called with them:
hierarchical(color)- One colour applied at several opacities, preserving the symbol’s depthpalette(color, ...)- Two or three explicit colours, applied in ordervariable(value)- A fill level from 0 to 1, for symbols that support variable rendering such aswifi,speaker.wave.3.fillandbattery.100. Symbols without it ignore the value.
image.symbol.weight
Syntax
image.symbol.weightA table containing the stroke weights for image.symbol():
ultralightthinlightregularmediumsemiboldboldheavyblack
image.symbol.scale
Syntax
image.symbol.scaleA table containing the symbol scales for image.symbol():
smallmediumlarge
image.width
Syntax
image.widthThe logical width of the image in points. For image.pixel(), points and physical texels are identical.
image.height
Syntax
image.heightThe logical height of the image in points. For image.pixel(), points and physical texels are identical.
image.depth
Syntax
image.depthThe depth of the image in pixels (for volume images)
image.numLayers
Syntax
image.numLayersThe number of layers in this image
image.hasMips
Syntax
image.hasMipsWhether this image has mip mapping or not
image.type
Syntax
image.typeThe type of this image:
image.type.texture- a 2D imageimage.type.cube- a cube image, created withimage.cube()image.type.volume- a volume image, created withimage.volume()
image.numMips
Syntax
image.numMipsThe number of mips this image has
image.sampler
Syntax
image.samplerThe sampler state for this image, which determines how texels are sampled by shaders
image.smooth
Syntax
image.smoothSets/gets whether this image has linear or nearest filtering
image.filter
Syntax
image.filterHow this image is filtered when drawn larger or smaller than its size:
image.filter.point- nearest pixel, for pixel artimage.filter.linear- blends neighbouring pixelsimage.filter.default- followsstyle.filter, the default
image.wrap
Syntax
image.wrapHow this image repeats when a mesh’s texture coordinates go beyond 0 and 1:
image.wrap.tile- repeats the imageimage.wrap.clamp- stretches the edge pixelsimage.wrap.mirror- repeats the image, flipping every other copyimage.wrap.default- followsstyle.wrap, the default
Tiling an image on a mesh
function setup()
    local checker = image.pixel(2, 2)
    checker:setPixel(1, 1, color(255, 0, 0))
    checker:setPixel(2, 2, color(255, 0, 0))
    checker:setPixel(1, 2, color(255))
    checker:setPixel(2, 1, color(255))
    checker:apply()
    checker.filter = image.filter.point
    checker.wrap = image.wrap.tile

    floor = mesh()
    floor.texture = checker
    -- texture coordinates from 0 to 3 show the image 3 times each way
    floor:addRect(vec2(WIDTH/2, HEIGHT/2), vec2(300, 300), 0, vec4(0, 0, 3, 3))
end

function draw()
    background(40)
    floor:draw()
end
image.slice
Syntax
image.sliceA new image.slice covering the whole image, to configure and draw with sprite()
image.key
Syntax
image.keyThe asset key for this image (if it has one)
image:setPixel(x, y, color)
Syntax
image:setPixel(x, y, color)Sets the colour of a pixel. x and y start at 1, from the bottom left corner, and are in points like width and height, so on an image made with image() a point covers several pixels. Use image.pixel() to set each pixel on its own.
The change is made to the image’s copy in memory. Call apply() before drawing the image or saving it.
Parameters
| x | integer. The x coordinate, from 1 to width |
| y | integer. The y coordinate, from 1 to height |
| color | color. The colour to set |
Setting pixels
function setup()
    img = image.pixel(4, 4)
    img:setPixel(1, 1, color(255, 0, 0))     -- bottom left
    img:setPixel(4, 4, 255, 255, 0, 255)     -- top right
    img:apply()
    img.filter = image.filter.point
end

function draw()
    background(40)
    sprite(img, WIDTH/2, HEIGHT/2, 200, 200)
end
image:setPixel(x, y, r, g, b, a)
Syntax
image:setPixel(x, y, r, g, b, a)Sets the colour of a pixel from its red, green, blue and alpha values, from 0 to 255
Parameters
| x | integer. The x coordinate, from 1 to width |
| y | integer. The y coordinate, from 1 to height |
| r | number. The red value |
| g | number. The green value |
| b | number. The blue value |
| a | number. The alpha value |
image:getPixel(x, y)
Syntax
image:getPixel(x, y)Returns the red, green, blue and alpha values of a pixel, from 0 to 255. Coordinates are as in setPixel().
This reads the image’s copy in memory, which holds what was set with setPixel(). A blank image reads as all zeros, and so does what was drawn into the image until readback() copies it.
Parameters
| x | integer. The x coordinate, from 1 to width |
| y | integer. The y coordinate, from 1 to height |
Returns
number |
The red, green, blue and alpha values |
number |
|
number |
|
number |
Reading a pixel
local img = image.pixel(2, 2)
img:setPixel(1, 1, color(255, 128, 0))
local r, g, b, a = img:getPixel(1, 1)
print(r, g, b, a) -- 255.0 128.0 0.0 255.0
image:setValue(x, y, r, g, b, a)
Syntax
image:setValue(x, y, r, g, b, a)Sets a pixel from raw values, as the image stores them: 0 to 1 for most formats, and any value for float formats such as image.rgba32f. Coordinates are as in setPixel(). Given a single value, sets red, green and blue to it, with an alpha of 1
Parameters
| x | integer. The x coordinate, from 1 to width |
| y | integer. The y coordinate, from 1 to height |
| r | number. The red value, or the value for red, green and blue |
| g | number. The green value (optional) |
| b | number. The blue value (optional) |
| a | number. The alpha value (optional | default = 1) |
image:getValue(x, y)
Syntax
image:getValue(x, y)Returns the raw red, green, blue and alpha values of a pixel, as the image stores them: 0 to 1 for most formats, and any value for float formats. Coordinates are as in setPixel()
Parameters
| x | integer. The x coordinate, from 1 to width |
| y | integer. The y coordinate, from 1 to height |
Returns
number |
The red, green, blue and alpha values |
number |
|
number |
|
number |
image:setForEach(func)
Syntax
image:setForEach(func)Sets every pixel from a function, called with the coordinates of each pixel, which returns its red, green, blue and alpha values as raw values, 0 to 1 for most formats. The function must return all four. Call apply() afterwards to see the result
Parameters
| func | function. A function taking x and y and returning r, g, b, a |
A gradient
function setup()
    gradient = image.pixel(64, 64)
    gradient:setForEach(function(x, y)
        return x / 64, y / 64, 0, 1
    end)
    gradient:apply()
end

function draw()
    background(40)
    sprite(gradient, WIDTH/2, HEIGHT/2, 256, 256)
end
image:apply()
Syntax
image:apply()Sends the pixels set with setPixel() to the image, so that they show when it is drawn or saved
image:readback()
Syntax
image:readback()Copies what was drawn into the image back to its copy in memory, so that getPixel() can read it. Waits until the copy is done.
Drawing is finished at the end of a frame: read back in a later frame than the one that drew into the image, and for drawing done in setup(), from the second frame on.
image:generateIrradiance(samples)
Syntax
image:generateIrradiance(samples)Generates a guassian pyramid of pre-computed irradiance levels, used for image based lighting
Parameters
| samples | integer. The number of samples to use (optional | default = 1024) |
Returns
image |
A new image containing the irradiance data |
image:generateIrradiance(target, samples)
Syntax
image:generateIrradiance(target, samples)Generates a guassian pyramid of pre-computed irradiance levels, used for image based lighting
Parameters
| target | image. A target image to store the irradiance data |
| samples | integer. The number of samples to use (optional | default = 1024) |
Returns
image |
The target image containing the irradiance data |
Image Formats top ↑
Here is a list of all currently available image formats
| Name | Type | Channels | SRGB |
|---|---|---|---|
| image.a8 | unorm | [8] | No |
| image.r8 | unorm | [8] | Yes |
| image.r8i | sint | [8] | No |
| image.r8u | uint | [8] | No |
| image.r8s | snorm | [8] | No |
| image.r16 | unorm | [16] | Yes |
| image.r16i | sint | [16] | No |
| image.r16u | uint | [16] | No |
| image.r16f | float | [16] | No |
| image.r16s | snorm | [16] | No |
| image.r32i | sint | [32] | No |
| image.r32u | uint | [32] | No |
| image.r32f | float | [32] | No |
| image.rgb8 | unorm | [8,8,8] | Yes |
| image.rgb8i | sint | [8,8,8] | No |
| image.rgb8u | uint | [8,8,8] | No |
| image.rgb8s | snorm | [8,8,8] | No |
| image.rg16 | unorm | [16,16,16] | Yes |
| image.rg16i | sint | [16,16,16] | No |
| image.rg16u | uint | [16,16,16] | No |
| image.rg16f | float | [16,16,16] | No |
| image.rg16s | snorm | [16,16,16] | No |
| image.rg32i | sint | [32,32,32] | No |
| image.rg32u | uint | [32,32,32] | No |
| image.rg32f | float | [32,32,32] | No |
| image.rgb9e5f | float | [9,9,9,+5] | No |
| image.bgra8 | unorm | [8,8,8,8] | Yes |
| image.rgba8 | unorm | [8,8,8,8] | Yes |
| image.rgba8i | sint | [8,8,8,8] | No |
| image.rgba8u | uint | [8,8,8,8] | No |
| image.rgba8u | sint | [8,8,8,8] | No |
| image.rgba8s | snorm | [8,8,8,8] | No |
| image.rgba16 | unorm | [16,16,16,16] | No |
| image.rgba16i | sint | [16,16,16,16] | No |
| image.rgba16u | uint | [16,16,16,16] | No |
| image.rgba16f | float | [16,16,16,16] | No |
| image.rgba16s | snorm | [16,16,16,16] | No |
| image.rgba32i | sint | [32,32,32,32] | No |
| image.rgba32u | uint | [32,32,32,32] | No |
| image.rgba32f | float | [32,32,32,32] | No |
| image.r5g6b5 | n/a | [5,6,5] | No |
| image.rgba4 | n/a | [4,4,4,4] | No |
| image.rgb5a1 | n/a | [5,5,5,1] | No |
| image.rgb10a2 | n/a | [10,10,10,2] | No |
| image.rg11b10f | float | [32,32,32,32] | No |
| image.d16 | uint | [16] | No |
| image.d24 | uint | [24] | n/a |
| image.d24s8 | depth/stencil | [24,8] | n/a |
| image.d32 | uint | [32] | n/a |
| image.d16f | uint | [16] | n/a |
| image.d24f | uint | [24] | n/a |
| image.d32f | float | [32] | n/a |
| image.d0s8 | stencil | [8] | n/a |
Sampler State / Mipmapping top ↑
The sampler state of an image is used to control texel sampling
The mag property controls magnification, i.e. when the image texels are larger than 1 pixel in size
The min property controls minification, i.e. when the image texels are smaller than 1 pixel in size
The mip property controls how mipmapping is handled, linear will blend between mip levels linearly, while point will map clamp to the nearest mip level and none disables mipmapping entirely
Sampler State / Mipmapping
samplerState top ↑
Syntax
samplerStatesamplerState.min
Syntax
samplerState.minThe minification filter, can be point, linear or none
samplerState.mag
Syntax
samplerState.magThe magnification filter, can be point, linear or none
samplerState.mip
Syntax
samplerState.mipThe mip filter, can be point, linear or none
samplerState.u
Syntax
samplerState.uThe u sampler mode, can be repeat, clamp or mirror
samplerState.v
Syntax
samplerState.vThe v sampler mode, can be repeat, clamp or mirror
samplerState.w
Syntax
samplerState.wThe w sampler mode, can be repeat, clamp or mirror
Slices and Atlases
image.slice top ↑
Syntax
image.sliceA portion of an image that you can draw with sprite(). Use slices to keep several sprites in one image.
Create a slice with image.slice, then chain commands to rotate, flip, or stretch it. A 9-patch slice lets a button or panel stretch while keeping its corners the same size.
Creating slices
function setup()
   button = image.read(asset.builtin.UI.Grey_Button_10)

   -- create a stretchable 9-patch of the original image
   buttonSlice = button.slice:patch(10)
end

function draw()
   sprite(buttonSlice, WIDTH/2, HEIGHT/2, 100, 50)
end
image.slice:name(name)
Syntax
image.slice:name(name)Parameters
| name | string. Name used to look up the slice in its atlas. |
image.slice:name()
Syntax
image.slice:name()Gets/sets the slice name (for retrieval in the atlas class)
image.slice:normal()
Syntax
image.slice:normal()Reset the slice to the normal drawing mode (from patch or polygon mode)
image.slice:rect(x, y, w, h)
Syntax
image.slice:rect(x, y, w, h)Parameters
| x | number. Slice rectangle or anchor coordinate; rectangle values are in image pixels and anchor values are normalized. |
| y | number. Slice rectangle or anchor coordinate; rectangle values are in image pixels and anchor values are normalized. |
| w | number. Slice rectangle or anchor coordinate; rectangle values are in image pixels and anchor values are normalized. |
| h | number. Slice rectangle or anchor coordinate; rectangle values are in image pixels and anchor values are normalized. |
image.slice:rect()
Syntax
image.slice:rect()Set/gets the sub-rectangle for the slice (in pixels). Use this to draw a portion of the sliced image
image.slice:patch(left, right, top, bottom)
Syntax
image.slice:patch(left, right, top, bottom)Parameters
| left | number. Inset from the corresponding edge, in pixels. |
| right | number. Inset from the corresponding edge, in pixels. |
| top | number. Inset from the corresponding edge, in pixels. |
| bottom | number. Inset from the corresponding edge, in pixels. |
image.slice:patch(margin)
Syntax
image.slice:patch(margin)Sets the slice to draw as a 9-patch using the supplied margins. This allows the slice to be stretched to an arbitrary size while maintaining fixed-sized borders
Parameters
| margin | number. Inset from the corresponding edge, in pixels. |
image.slice:padding(left, right, top, bottom)
Syntax
image.slice:padding(left, right, top, bottom)Parameters
| left | number. Inset from the corresponding edge, in pixels. |
| right | number. Inset from the corresponding edge, in pixels. |
| top | number. Inset from the corresponding edge, in pixels. |
| bottom | number. Inset from the corresponding edge, in pixels. |
image.slice:padding(amount)
Syntax
image.slice:padding(amount)Parameters
| amount | number. Inset from the corresponding edge, in pixels. |
image.slice:padding()
Syntax
image.slice:padding()Sets/gets the slice padding. This allows for a larger slice to be drawn but discards empty space at the edges (useful sprites packed into an atlas that trims empty space)
image.slice:anchor(x, y)
Syntax
image.slice:anchor(x, y)Parameters
| x | number. Slice rectangle or anchor coordinate; rectangle values are in image pixels and anchor values are normalized. |
| y | number. Slice rectangle or anchor coordinate; rectangle values are in image pixels and anchor values are normalized. |
image.slice:anchor()
Syntax
image.slice:anchor()Sets/gets the slice anchor (also known as a pivot). The anchor is the geometric center of the slice for transformations such as rotation/scale and flipping
image.slice:rotate(angle)
Syntax
image.slice:rotate(angle)Parameters
| angle | integer. Texture rotation in degrees, in multiples of 90. |
image.slice:rotate()
Syntax
image.slice:rotate()Sets/gets the sice rotation (in discrete 90 degree turns). Useful for atlas packed sprites that might be rotated to fit, or when reusing a slice at a different 90 degee angle
image.slice:flip(x, y)
Syntax
image.slice:flip(x, y)Parameters
| x | boolean. Whether to flip the slice along this axis. |
| y | boolean. Whether to flip the slice along this axis. |
image.slice:flip()
Syntax
image.slice:flip()Sets/gets the horizontal and vertical flip for the slice
image.slice.image
Syntax
image.slice.imageThe image this slice is derived from
image.slice.atlas
Syntax
image.slice.atlasThe atlas this slice is part of
atlas top ↑
Syntax
atlasA collection of image.slice objects generated from an image
Often 2D game assets will be compiled into a single image (known as an atlas or sprite sheet) for convienience and efficiency. These can be loaded from an external text file or generated using some simple settings
Access an image’s atlas with its atlas property, for example local sprites = myImage.atlas. Use sprites[index] (starting at 1) or sprites["name"] to retrieve a slice. There is no atlas(image) constructor.
atlas.read(assetKey)
Syntax
atlas.read(assetKey)Parameters
| assetKey | asset.key. Asset key identifying the atlas file. |
atlas.save(assetKey, atlas)
Syntax
atlas.save(assetKey, atlas)Parameters
| assetKey | asset.key. Asset key identifying the atlas file. |
| atlas | atlas. Atlas to save. |
atlas:clear()
Syntax
atlas:clear()atlas:setWithCellSize(cellWidth, cellHeight, padding)
Syntax
atlas:setWithCellSize(cellWidth, cellHeight, padding)Parameters
| cellWidth | integer. Cell width or height in pixels. |
| cellHeight | integer, optional. Cell width or height in pixels. |
| padding | integer, optional. Space between adjacent cells, in pixels. |
atlas:setWithCellCount(cellColumns, cellRows, padding)
Syntax
atlas:setWithCellCount(cellColumns, cellRows, padding)Parameters
| cellColumns | integer. Number of columns or rows in the grid. |
| cellRows | integer, optional. Number of columns or rows in the grid. |
| padding | integer, optional. Space between adjacent cells, in pixels. |
Fonts
font top ↑
Choose a font with font("Helvetica") and set its size with fontSize(32). Use font.metrics() when arranging text along a shared baseline or aligning text with other elements.
font.metrics()
Syntax
font.metrics()Returns a new table of measurements for the current font, size, and text renderer. All measurements are in points. Changing the drawing style later does not change a previously returned table.
Ascent and descent are positive distances above and below the baseline. Leading is the extra spacing between lines. These describe the font, not the bounds of a particular string; use textSize() to measure a string. Shadows, outlines, and tags within a string do not affect these measurements.
Native and atlas measurements can differ. Atlas font sizes use whole points.
Returns
font.private.metrics |
A snapshot of the current font measurements. |
font("Helvetica")
fontSize(32)
local metrics = font.metrics()
local baseline = 200
shapeMode(CORNER)
text("Hello", 40, baseline - metrics.descent)